
What is a Release of Liability?

What Is a Release of Liability

You receive a settlement offer after a car accident, insurance claim, or contract dispute. The amount seems reasonable, and you’re ready to move on. Then you notice one more document attached to the paperwork: a Release of Liability.

At first glance, it may look like just another form. In reality, it is often the most important document in the entire settlement process.

Many people focus on the payment amount and overlook the legal consequences of signing a release. That can be a costly mistake. Once signed, a release of liability often prevents you from seeking additional compensation related to the same incident, even if new expenses or injuries appear later.

Before putting your signature on any release, it is important to understand exactly what it does, what rights you may be giving up, and when you should consider getting professional advice.

Key Takeaway

A release of liability is a legal agreement that usually ends your right to sue or make additional claims regarding a specific incident. It is commonly used in settlements, insurance claims, injury cases, debt negotiations, and business disputes. Before signing, make sure you understand the scope of the release, the compensation being offered, and whether there are any future risks that could affect you.

What Is a Release of Liability?

A release of liability is a written agreement between two or more parties that resolves legal responsibility for a specific matter.

In simple terms, one party agrees not to pursue further legal claims against another party in exchange for something of value, which is often money.

The document is sometimes referred to as:

  • Release of claims
  • Settlement release
  • Liability release agreement
  • Legal release form

Once properly signed and executed, the release generally closes the matter permanently.

For the party making the payment, the release provides protection against future lawsuits. For the person receiving compensation, it provides certainty that the agreed payment or benefit will be delivered.

Why Release of Liability Agreements Exist

Disputes can be expensive and time-consuming for everyone involved.

Without a release agreement, a person could accept compensation today and later file another claim regarding the same incident. Businesses, insurance companies, and individuals often require releases because they want finality.

A release serves several purposes:

  • Ends legal disputes
  • Prevents future lawsuits related to the same issue
  • Reduces legal costs
  • Creates certainty for both parties
  • Allows settlements to be completed quickly

In many cases, the release is what officially closes the file.

Without it, the dispute may remain unresolved despite a payment being made.

Common Situations Where Releases Are Used

Most people encounter release forms at least once in their lives.

Insurance Settlements

Insurance companies frequently require releases before issuing settlement checks.

Examples include:

  • Auto accident claims
  • Property damage claims
  • Homeowners insurance settlements
  • Bodily injury claims

The insurer wants confirmation that the payment fully resolves the matter.

Personal Injury Cases

Nearly every personal injury settlement includes a release agreement.

This can involve:

  • Slip and fall accidents
  • Car accidents
  • Workplace injuries
  • Premises liability claims

The release ensures the injured party cannot return later seeking additional compensation for the same incident.

Debt Settlement Agreements

Creditors may accept less than the full amount owed in exchange for a release.

Once signed, the creditor generally agrees not to pursue the remaining balance.

Business Disputes

Businesses frequently use releases when resolving conflicts involving:

  • Breach of contract claims
  • Vendor disputes
  • Partnership disagreements
  • Employment matters

A release allows both parties to move forward without continuing litigation.

Recreational Activities and Events

You may encounter release forms before participating in activities such as:

  • Fitness classes
  • Sporting events
  • Adventure tours
  • Volunteer programs

These releases are often signed before an activity begins and are designed to limit future liability.

What Rights Are You Giving Up?

This is the most important question to ask before signing.

While every release is different, most require you to give up certain legal rights.

These may include:

  • The right to sue regarding the covered incident
  • The right to seek additional compensation later
  • The right to bring related claims against listed parties
  • The right to pursue future legal action involving the same dispute

In many cases, these rights are surrendered permanently.

That is why reviewing the document carefully is critical.

Release of Liability vs. Liability Waiver

Many people use these terms interchangeably, but they are not exactly the same.

Release of Liability

A release of liability is commonly used after an incident occurs or during settlement negotiations.

Its purpose is to formally close a claim.

Examples include:

  • Insurance settlements
  • Injury settlements
  • Debt resolutions
  • Contract disputes

Liability Waiver

A liability waiver is often signed before an activity begins.

Its purpose is to acknowledge risks and limit future legal responsibility.

Examples include:

  • Gym memberships
  • Sports leagues
  • Adventure activities
  • Recreational events

The key distinction is timing.

Waivers are generally preventative. Releases are generally used to conclude an existing matter.

A Simple Example of How It Works

Imagine you are involved in a minor car accident.

The other driver’s insurance company investigates the claim and offers $3,000 to cover:

  • Vehicle repairs
  • Medical expenses
  • Miscellaneous costs

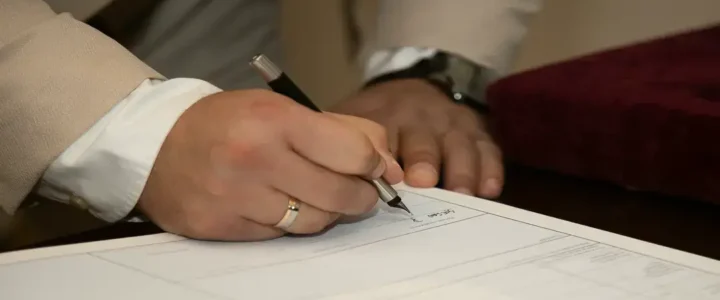
Before sending payment, the insurer asks you to sign a release of liability.

The release states that you agree not to pursue any future claims related to the accident.

You sign the document and accept the money.

Several months later, you discover an injury connected to the crash that requires additional treatment.

Because you signed a broad release, you may no longer have the right to request additional compensation.

This example highlights why understanding the full impact of a release is so important.

Key Items to Review Before Signing

Never assume a release is standard or harmless.

Review every section carefully.

Scope of the Release

Determine exactly what claims are being released.

Ask questions such as:

  • Does it apply only to this incident?
  • Does it include unknown claims?
  • Does it cover unrelated matters?

Broad language can sometimes extend further than expected.

Parties Being Released

Check who receives protection under the agreement.

This may include:

  • Individuals
  • Businesses
  • Insurance companies
  • Contractors
  • Related organizations

The list can sometimes be broader than anticipated.

Compensation Being Offered

Consider whether the payment fairly reflects your losses.

Evaluate:

  • Current expenses
  • Future medical treatment
  • Repair costs
  • Lost income
  • Potential long-term effects

Once a release is signed, renegotiation is often impossible.

Duration

Many releases are permanent.

Verify whether the agreement:

  • Lasts forever
  • Has limited duration
  • Applies only to specific claims

Most settlement releases are intended to be final.

Exceptions

Some releases contain carve-outs or exceptions.

For example, the agreement may exclude:

  • Intentional misconduct
  • Fraud
  • Gross negligence
  • Unrelated future claims

These exceptions can significantly affect your rights.

Red Flags to Watch For

Not all release agreements are created equally.

Pay close attention to warning signs such as:

Overly Broad Language

Phrases like:

  • Any and all claims
  • Known or unknown claims
  • Past, present, and future claims

can dramatically expand the release’s reach.

Pressure to Sign Quickly

Be cautious if someone says:

  • Sign today or the offer disappears
  • You don’t need to read it
  • Everyone signs this

Legitimate settlements generally allow reasonable review time.

Vague Wording

If key terms are unclear, ask questions before signing.

Ambiguous language can create unexpected consequences.

Unresolved Medical Issues

Avoid signing while medical treatment is ongoing unless you fully understand the risks.

Future complications could become your responsibility after the release is executed.

When You Should Consider Speaking With a Lawyer

Not every release requires legal review.

However, legal advice may be worthwhile when:

  • Significant money is involved
  • Serious injuries occurred
  • Future medical treatment is uncertain
  • The language seems confusing
  • The agreement appears unusually broad
  • You are being pressured to sign

An attorney can explain the consequences, identify hidden risks, and negotiate more favorable terms if necessary.

Are Releases Always Enforceable?

Generally, yes.

Courts often enforce release agreements when they are:

  • Clearly written
  • Voluntarily signed
  • Supported by valid consideration
  • Properly executed

However, there are situations where a court may refuse to enforce a release.

Examples may include:

  • Fraud
  • Misrepresentation
  • Coercion
  • Duress
  • Violations of state law

The specific rules vary depending on jurisdiction and circumstances.

Practical Tips Before Signing a Release of Liability

Before agreeing to any release, consider the following checklist.

Take Your Time

Never feel obligated to sign immediately.

Ask for a copy and review it carefully.

Keep Documentation

Maintain copies of:

  • Medical records
  • Repair estimates
  • Bills
  • Settlement communications
  • Emails and letters

Documentation helps you evaluate whether the settlement is fair.

Confirm Payment Details

Before signing, understand:

  • Payment amount
  • Payment method
  • Payment timing
  • Any conditions attached

A release should not leave uncertainty about compensation.

Get Important Promises in Writing

Do not rely on verbal assurances.

If something matters, make sure it appears in the written agreement.

Ask About Exceptions

If future medical treatment remains uncertain, discuss whether limited exceptions can be included.

In some situations, negotiated carve-outs may provide additional protection.

Frequently Asked Questions

What does release of liability mean?

It means you agree not to pursue legal claims against the released party regarding the specific matter covered by the agreement.

Can a release cover unknown future claims?

Yes. Some releases contain language that includes claims that are currently unknown. This is one reason careful review is essential.

Should I sign a release to receive a quick payment?

Only after confirming that the compensation adequately covers your losses and that you understand the rights being surrendered.

What if I signed a release under pressure?

In some circumstances, a release signed under coercion, fraud, or duress may be challenged. Legal advice may be helpful if you believe improper pressure was involved.

Do all settlements include a release?

Most settlements include some form of release because it provides closure and helps prevent future litigation regarding the same dispute.

Disclaimer: This article was generated with the assistance of ChatGPT and reviewed for publication purposes. The content is intended for informational and educational purposes only and should not be considered legal advice. Readers should consult a qualified attorney or legal professional regarding their specific situation before signing any release of liability agreement.

How Long Do Insurance Claims Usually Take?

How Long Do Insurance Claims Usually Take

Filing an insurance claim can be stressful, especially when you’re already dealing with vehicle damage, property loss, medical expenses, or another unexpected situation. One of the first questions most people ask is simple: how long will it take to get paid?

The answer depends on several factors, including the type of insurance claim, the complexity of the case, the quality of the documentation provided, and whether there are disputes involved. Some claims are resolved within a few days, while others can take months or even years if litigation becomes necessary.

Key Takeaway

Most insurance claims are resolved within days to a few months. Minor auto claims often take between 1 and 14 days, while major homeowners or disputed claims may take several months. The fastest way to avoid delays is to report the claim immediately, provide complete documentation, and maintain regular communication with the adjuster.

Typical Insurance Claim Timelines

Every claim is unique, but most fall within predictable timeframes.

Auto Insurance Claims

Minor Auto Claims

Examples include small fender benders, cracked windshields, or minor cosmetic damage.

Typical timeline:

  • 1 to 14 days

These claims are generally straightforward because the damage is easy to assess and liability is often clear.

Major Auto Claims or Total Losses

Examples include severe accidents, extensive repairs, or vehicles declared a total loss.

Typical timeline:

  • 2 to 8 weeks

Additional time may be needed for inspections, repair estimates, valuation reports, and settlement negotiations.

Homeowners Insurance Claims

Minor Property Damage

Examples include small water leaks, minor storm damage, or limited repairs.

Typical timeline:

  • 2 to 4 weeks

Claims move relatively quickly when damage is easy to document and repair costs are straightforward.

Major Property Losses

Examples include house fires, major storm damage, structural repairs, or total losses.

Typical timeline:

  • 1 to 6 months or longer

Large claims often require multiple inspections, contractor estimates, engineering reports, and lender involvement.

Health Insurance Claims

Clean Medical Claims

Claims with complete documentation and no billing disputes.

Typical timeline:

  • 7 to 30 days

Most insurers process routine claims within this timeframe.

Disputed Medical Claims

Claims involving denied treatments, coding issues, or coverage disagreements.

Typical timeline:

  • 1 to 6 months

Appeals and reviews can significantly extend the process.

Workers’ Compensation Claims

Workers’ compensation timelines vary widely depending on the injury and state regulations.

Typical timeline:

  • Initial processing: Days to weeks
  • Settlement: Several months to multiple years

Serious injuries often require extensive medical evaluations and negotiations before reaching a final settlement.

What Determines How Long an Insurance Claim Takes?

Several factors influence whether a claim moves quickly or gets stuck in the system.

Type of Coverage

Different insurance products have different levels of complexity.

For example:

  • Auto claims often involve repair estimates and liability reviews.
  • Homeowners claims may require inspections and contractor assessments.
  • Medical claims often require billing verification and coding reviews.

The more moving parts involved, the longer the process may take.

Complexity of the Claim

Simple claims generally move faster than complicated ones.

Factors that increase complexity include:

  • Multiple parties involved
  • Significant property damage
  • Serious injuries
  • Unclear liability
  • Large settlement amounts

The more questions an insurer must answer, the longer the investigation typically takes.

Documentation Quality

One of the biggest causes of delay is missing information.

Submitting complete documentation from the beginning can significantly reduce processing time.

Helpful documents may include:

  • Photos and videos
  • Police reports
  • Medical records
  • Repair estimates
  • Receipts
  • Witness statements

Incomplete paperwork often leads to repeated requests for information.

Insurance Company Workload

Insurance companies can experience claim backlogs during major events.

Examples include:

  • Hurricanes
  • Floods
  • Wildfires
  • Hailstorms
  • Large regional disasters

When thousands of policyholders file claims at the same time, processing times naturally increase.

Liability Disputes

Disagreements about fault are among the most common reasons claims take longer.

Examples include:

  • Drivers giving conflicting accounts of an accident
  • Property owners disputing responsibility
  • Medical providers challenging coverage decisions

The insurer may need additional evidence before making a decision.

State Regulations

Many states require insurance companies to respond within specific timeframes.

Although exact rules vary, insurers are often required to:

  • Acknowledge claims within a set number of days
  • Request additional documentation promptly
  • Accept or deny claims within a reasonable period

Understanding your state’s requirements can help you recognize unreasonable delays.

The Insurance Claim Process Step by Step

Understanding what happens behind the scenes can help set realistic expectations.

Step 1: Report the Claim

Estimated timeline:

  • Same day

The process begins when you notify your insurer about the incident.

To avoid delays:

  • Report the incident immediately
  • Provide accurate details
  • Request a claim number

Waiting too long to file can create complications.

Step 2: Adjuster Assignment

Estimated timeline:

  • 24 hours to 7 days

An insurance adjuster is assigned to investigate and evaluate the claim.

During this stage:

  • Ask for the adjuster’s contact information
  • Confirm the expected timeline
  • Clarify any documentation requirements

Clear communication early in the process often prevents misunderstandings later.

Step 3: Inspection and Documentation

Estimated timeline:

  • Minor auto claims: 1 to 14 days
  • Major property claims: 1 to 6 weeks or longer

The insurer reviews evidence and assesses the damage.

Helpful actions include:

  • Taking detailed photographs
  • Recording videos
  • Obtaining repair estimates
  • Organizing receipts

The sooner evidence is provided, the sooner the claim can move forward.

Step 4: Estimate Review and Negotiation

Estimated timeline:

  • 3 days to several weeks

The insurer calculates repair costs or settlement amounts.

At this stage:

  • Review estimates carefully
  • Compare contractor bids
  • Submit additional documentation if necessary

Supporting your position with evidence often results in a smoother negotiation process.

Step 5: Approval and Payment

Estimated timeline:

  • Same day to 30 days after agreement

Once a settlement is reached, payment is processed.

Depending on the claim, payment may go directly to:

  • The policyholder
  • A repair facility
  • A contractor
  • A mortgage lender

Ask your insurer how the payment will be handled to avoid surprises.

Step 6: Appeals or Litigation

Estimated timeline:

  • Months to years

If a claim is denied or significantly underpaid, the dispute process may begin.

Possible next steps include:

  • Internal appeals
  • Independent appraisals
  • Mediation
  • Arbitration
  • Litigation

Although these options can extend the timeline, they may be necessary to secure a fair outcome.

Common Causes of Insurance Claim Delays

Even straightforward claims can encounter obstacles.

Some of the most common causes include:

  • Missing documentation
  • Incomplete claim forms
  • High claim volume after disasters
  • Liability disputes
  • Delayed repair estimates
  • Slow responses from medical providers
  • Contractor scheduling issues
  • Multiple parties involved in the claim

Many delays are preventable with careful organization and proactive communication.

Warning Signs That a Claim May Be Stalling

Most insurers provide regular updates throughout the process.

However, certain signs may indicate unnecessary delays.

Watch for:

  • Repeated requests for documents already submitted
  • Long periods with no communication
  • Unclear explanations regarding next steps
  • Constant changes in claim representatives
  • Missed callback promises

If more than 10 to 14 business days pass without meaningful progress, it may be time to follow up.

What to Do if Progress Stops

Consider taking the following steps:

  1. Contact the adjuster directly.
  2. Request a written status update.
  3. Ask to speak with a supervisor.
  4. Keep records of every conversation.
  5. Contact your state’s insurance regulator if necessary.

Professional persistence often helps move stalled claims forward.

How to Speed Up an Insurance Claim

While you cannot control every aspect of the process, you can reduce unnecessary delays.

Take Photos Immediately

Document damage as soon as it is safe to do so.

Include:

  • Wide-angle photos
  • Close-up images
  • Video walkthroughs
  • Timestamps when possible

Strong documentation minimizes disputes later.

Keep Records Organized

Create a dedicated folder for:

  • Receipts
  • Estimates
  • Emails
  • Medical records
  • Police reports

Easy access to documentation allows you to respond quickly when information is requested.

Obtain Repair Estimates Early

Waiting for estimates can significantly slow down a claim.

Getting contractor or repair shop quotes early provides valuable documentation and helps establish realistic repair costs.

Follow Up in Writing

Phone calls are helpful, but written communication creates a record.

Whenever possible:

  • Use email
  • Save text messages
  • Keep copies of letters
  • Document dates and conversations

A clear paper trail can be extremely valuable if disputes arise.

A Real-World Example

Imagine a homeowner named Maria who experiences roof damage after a severe hailstorm.

She files her claim the same day and uploads detailed photos of the damage. Within two days, the insurance company assigns an adjuster. However, because hundreds of homeowners in the area are filing claims at the same time, inspections are delayed for several weeks.

Rather than waiting passively, Maria obtains two contractor estimates and sends them directly to the adjuster. The additional information helps establish repair costs early and reduces the amount of back-and-forth communication required.

As a result, her claim moves forward more efficiently than many others in the same area.

Frequently Asked Questions

How long does it take to receive payment after claim approval?

In many cases, payment arrives within a few days to 30 days after settlement approval. The timeline depends on factors such as lender involvement, contractor verification, and payment processing procedures.

Can an insurance company reverse an approved claim?

Although uncommon, it can happen if significant new information emerges. Request written explanations if the claim status changes unexpectedly.

Should I hire an attorney for a delayed claim?

An attorney may be worth considering if the insurer repeatedly delays the claim, denies it without sufficient explanation, or offers significantly less than documented repair costs.

What if the insurance company is not responding?

Keep detailed records of all communications, escalate the matter to a supervisor, and consider filing a complaint with your state’s insurance regulator if progress remains stalled.

Can an insurance agent help speed up the process?

Often, yes. Agents and brokers can assist with communication, documentation, and follow-up efforts, helping keep the claim moving through the system.

Disclaimer: This article was generated with the assistance of ChatGPT and reviewed for publication purposes. While efforts have been made to ensure accuracy and usefulness, readers should verify information with their insurance provider, legal professional, or relevant regulatory authority before making decisions based on the content.

What Happens After Signing a Settlement?

What Happens After Signing a Settlement

Signing a debt settlement agreement can feel like a huge relief. After weeks or months of stress, calls, letters, and financial pressure, it may seem like the hardest part is finally over. In many ways, it is a major step forward. However, signing the agreement is not the same as being completely finished.

What happens after signing a settlement depends on the terms of the agreement, who you settled with, how the creditor reports the account, and whether you complete every required payment on time. The next few weeks and months matter because this is when the settlement is processed, payments are confirmed, credit reporting may update, and important documents should be saved.

If you do not follow up, you may run into problems later. The creditor may not update the account correctly. A collection agency may continue contacting you. A credit report may still show the account as unpaid. You may also receive a tax form later if part of the debt was forgiven.

The good news is that most of these issues can be avoided with careful record keeping, written confirmation, and regular follow-up.

Key Takeaway

After signing a settlement, your main job is to make sure the agreement is properly completed and documented. You should:

  • Keep a copy of the signed settlement agreement
  • Make payments exactly as agreed
  • Save proof of every payment
  • Ask for written confirmation once the account is satisfied
  • Monitor your credit reports for updates
  • Watch for possible tax documents, such as a 1099-C
  • Follow up in writing if the creditor or collector does not honor the terms

A signed settlement can help resolve a debt, but only if the payment terms are completed and the creditor updates the account correctly.

What Signing a Settlement Actually Means

A debt settlement is an agreement between you and a creditor or collection agency. In most cases, the creditor agrees to accept less than the full balance owed in exchange for payment. Once you complete the agreed terms, the account should be marked as settled, satisfied, or closed, depending on the wording of the agreement.

The exact result depends on the settlement terms. Some agreements require one lump-sum payment. Others allow several payments over time. Some creditors may agree to mark the account as paid in full, while others may report it as settled for less than the full balance.

This difference matters because credit reporting language can affect how future lenders view the account.

For example:

  • “Paid in full” usually means the full balance was paid
  • “Settled” usually means the creditor accepted less than the full balance
  • “Settled for less than full balance” may show that the debt was resolved for a reduced amount
  • “Account closed” may appear after the settlement is fully processed
  • “Satisfaction of debt” may be used to confirm that the creditor considers the agreement complete

Before assuming the debt is gone, read the agreement carefully. The settlement should clearly state what amount must be paid, when it must be paid, and what happens after payment is completed.

Immediate Steps to Take After Signing

The first few days after signing are important. This is when you should organize your paperwork, confirm payment instructions, and protect yourself from future confusion.

1. Save the Signed Settlement Agreement

Keep a digital and printed copy of the signed agreement. Store it somewhere easy to find. You may need it later if the creditor reports the account incorrectly or if another collector contacts you about the same debt.

Your agreement should show:

  • Creditor or collection agency name
  • Account number
  • Settlement amount
  • Payment deadline
  • Payment method
  • Whether the payment settles the account in full
  • What balance, if any, remains after payment
  • How the creditor will report the account
  • Signature or written approval from the creditor or collector

If anything is unclear, ask for clarification in writing before making payment.

2. Confirm the Payment Instructions

Before sending money, make sure you know exactly where and how to pay. Use only the official payment method listed by the creditor or collector.

Confirm these details:

  • Payment amount
  • Due date
  • Mailing address or online payment link
  • Whether payment must be made by certified funds
  • Whether partial payments are allowed
  • Whether there are processing fees
  • What reference number to include

If the instructions were given only over the phone, request written confirmation before paying.

3. Make Payments on Time

If your settlement requires a lump-sum payment, pay it before the deadline. If it requires multiple payments, set reminders so you do not miss a due date.

Missing a payment can cause serious problems. In some agreements, one missed payment can cancel the settlement and allow the creditor to resume collection for the full balance.

To avoid problems:

  • Set calendar reminders
  • Keep enough money in the payment account
  • Save confirmation numbers
  • Take screenshots of online payments
  • Keep bank statements showing the payment cleared

Do not assume that scheduling a payment means it has posted. Follow up until you confirm the creditor received it.

What Happens in the First 30 Days?

The first month is usually when the creditor processes your payment and updates the account internally. This does not always happen overnight.

During the first 30 days, you should:

  • Confirm that your payment was received
  • Ask whether the account has been updated
  • Request a receipt or payment confirmation
  • Save all emails, letters, and confirmation numbers
  • Check whether the account still shows a balance
  • Follow up if the payment has not posted

If you paid by check, wait until it clears. If you paid online, save the transaction receipt. If you paid by phone, write down the confirmation number and the name of the representative.

A good follow-up question is:

“Can you confirm that my settlement payment has posted and that the account is being updated according to the agreement?”

What Happens After 30 to 60 Days?

Credit reporting updates may take time. Even after the creditor processes the settlement, the updated status may not appear on your credit reports right away.

Most creditors and collectors report account updates on a regular cycle. This means your credit reports may not reflect the settlement immediately.

During this period, review your credit reports from:

  • Experian
  • Equifax
  • TransUnion

Look for the account status, balance, and remarks. The account should not continue showing the full unpaid balance if the settlement was completed according to the agreement.

Possible updates may include:

  • Settled
  • Paid settlement
  • Paid in full
  • Account closed
  • Zero balance
  • Settled for less than full balance

If the account still shows the wrong balance after enough time has passed, contact the creditor in writing and ask them to correct the reporting.

What Happens After 60 to 90 Days?

By this point, a completed settlement should usually be reflected in the creditor’s system. If you made a lump-sum payment, the account should be closed or marked as settled. If you are on a payment plan, you should continue making payments exactly as agreed.

This is also a good time to request a final confirmation letter if you have not already received one.

Ask for a letter that confirms:

  • The account number
  • The settlement amount paid
  • The date payment was received
  • The account is settled or satisfied
  • No further amount is owed
  • The creditor will not continue collection on the remaining balance

This letter is sometimes called a satisfaction letter, paid letter, settlement completion letter, or account closure letter.

Keep it permanently with your financial records.

How a Settlement Can Affect Your Credit Report

A settlement may help stop collection activity and resolve the account, but it does not always remove the negative history from your credit report.

If the account was already late, charged off, or in collections, that history may remain for several years. A settled account may look better than an unpaid account, but it may still be viewed less favorably than an account paid in full.

Credit impact depends on several factors:

  • How late the account was before settlement
  • Whether the account was already charged off
  • Whether it was handled by the original creditor or a collection agency
  • How the creditor reports the settlement
  • Your overall credit history
  • Whether other accounts are current

The most important thing is accuracy. If the account was settled, the balance should not continue showing as fully unpaid. If the creditor agreed to a specific reporting status, compare your credit report against the written agreement.

Settling With the Original Creditor vs. a Collection Agency

Who you settle with can affect what happens next.

Original Creditor

The original creditor is the company you first owed money to. This may be a credit card company, lender, medical provider, or service provider.

An original creditor may have more control over how the account is updated. They may be able to report the account as paid, settled, closed, or charged off with a zero balance.

Collection Agency

A collection agency may collect on behalf of the creditor or may own the debt after buying it. If you settle with a collection agency, make sure the agreement clearly says that the remaining balance will not be sold, transferred, or collected later.

Ask for written confirmation that:

  • The settlement resolves the full collection account
  • No remaining balance will be pursued
  • The account will not be resold for further collection
  • The credit bureaus will be updated, if the agency reports the account

This is especially important when dealing with older debts or accounts that have changed hands.

Possible Tax Forms After a Settlement

If a creditor forgives part of your debt, you may receive a Form 1099-C for canceled debt. This can happen when $600 or more is forgiven.

A 1099-C does not always mean you automatically owe taxes, but it does mean the forgiven amount was reported. Some people may qualify for exceptions, such as insolvency or bankruptcy-related exclusions.

If you receive a 1099-C, do not ignore it. Keep it with your tax records and speak with a qualified tax professional. They can help you understand whether the canceled debt is taxable in your situation.

Keep these records for tax purposes:

  • Settlement agreement
  • Payment proof
  • Satisfaction letter
  • Original balance
  • Amount forgiven
  • Any 1099-C form received
  • Notes from communication with the creditor

What to Do If the Creditor Does Not Honor the Agreement

Sometimes problems happen after a settlement is signed. A payment may not be applied correctly. The creditor may continue reporting the wrong balance. A collector may keep calling. Another agency may contact you about the same account.

If that happens, stay calm and respond with documentation.

Steps to Take

  • Contact the creditor or collector in writing
  • Include a copy of the settlement agreement
  • Include proof of payment
  • Ask for correction within a reasonable time
  • Keep copies of every message you send
  • Send important letters by certified mail if needed
  • Dispute inaccurate credit reporting with the credit bureaus
  • Contact a consumer protection agency or attorney if the issue continues

Do not rely only on phone calls when a creditor violates the agreement. Written records are much stronger.

Sample Email Requesting Written Confirmation

Use this short script after making your settlement payment:

Hello, this message confirms that I made the agreed settlement payment for account #[account number] in the amount of $[amount] on [date]. Please send written confirmation that the account is satisfied, settled, or closed according to our agreement, and that no further balance is owed. Thank you.

If you have not yet paid and want the written agreement first, use this version:

Hello, this message confirms our settlement discussion for account #[account number]. Please send the written settlement agreement showing the payment amount, due date, account status after payment, and confirmation that the remaining balance will not be collected after the agreement is completed.

Record-Keeping Checklist

Keep your settlement records in one folder. This may help you later if there is a credit reporting error, tax issue, or collection dispute.

Save the following:

  • Signed settlement agreement
  • Proof of payment
  • Bank statements showing cleared payments
  • Confirmation numbers
  • Emails from the creditor or collector
  • Letters received by mail
  • Notes from phone calls
  • Names of representatives you spoke with
  • Credit reports before and after settlement
  • Satisfaction letter or account closure letter
  • Any 1099-C tax form

Good records can save you from having to prove everything from memory months or years later.

Common Mistakes to Avoid

A settlement can be helpful, but only if handled carefully. Avoid these common mistakes:

  • Paying before getting the agreement in writing
  • Missing a payment deadline
  • Assuming the account is closed without confirmation
  • Throwing away receipts or letters
  • Ignoring credit report errors
  • Forgetting to check all three credit bureaus
  • Assuming no tax form will arrive
  • Settling with a collector without confirming the debt will not be resold
  • Trusting verbal promises that are not included in the written agreement

The safest approach is simple: get it in writing, pay as agreed, save proof, and verify the account update.

A Simple Timeline After Signing a Settlement

Here is a quick timeline to help you stay organized.

Days 1 to 7

  • Save the signed agreement
  • Confirm payment instructions
  • Make the agreed payment if due
  • Save payment proof
  • Write down contact names and dates

Days 7 to 30

  • Confirm that payment posted
  • Ask for a receipt or confirmation
  • Check whether the creditor updated the account internally
  • Request a satisfaction letter if payment is complete

Days 30 to 60

  • Review your credit reports
  • Check the account status and balance
  • Contact the creditor if the reporting looks wrong
  • Save updated credit report copies

Days 60 to 90 and Beyond

  • Continue payments if you are on a plan
  • Keep all records
  • Watch for tax documents
  • Dispute incorrect reporting if needed
  • Keep the satisfaction letter permanently

Protect Yourself After the Settlement Is Signed

A settlement is not fully complete until the creditor receives payment, updates the account, and confirms that the agreement has been satisfied. Your job is to make sure every step is documented.

The most important actions are simple:

  • Keep the agreement
  • Pay exactly as promised
  • Save every receipt
  • Get written confirmation
  • Check your credit reports
  • Keep tax documents
  • Follow up quickly if something looks wrong

Signing the settlement is a big step, but the follow-through protects you. With the right records and a little organization, you can make sure the account is resolved properly and avoid unnecessary problems later.

AI Content Disclosure

This article was generated via ChatGPT and reviewed for clarity, accuracy, and usefulness for readers. It is provided for general informational purposes only and should not be treated as legal, financial, tax, or credit counseling advice.

How Do Small Businesses Resolve Financial Disputes?

How Do Small Businesses Resolve Financial Disputes

Financial disputes are part of running a business, but they can become expensive if they are handled the wrong way. A late payment, incorrect invoice, chargeback, contract disagreement, or service complaint can quickly affect cash flow and create tension with vendors, clients, or partners.

The good news is that most small business financial disputes do not need to turn into a legal battle right away. Many can be resolved through clear documentation, calm communication, practical negotiation, and a written agreement that both sides can follow.

The key is to act early, stay organized, and avoid emotional reactions. A dispute may feel personal, especially when money is involved, but the best results usually come from a professional and evidence-based approach.

Key Takeaway

Small businesses can resolve financial disputes by documenting the issue, contacting the other party with clear evidence, proposing a fair solution, and escalating only when informal efforts do not work.

A simple process looks like this:

  • Review the invoice, contract, purchase order, or agreement
  • Gather proof such as emails, receipts, delivery records, and payment history
  • Contact the other party calmly and explain the issue
  • Offer a practical resolution, such as a corrected invoice, payment plan, refund, credit, or mediation
  • Put every agreement in writing
  • Use small claims court or legal help only when necessary

The earlier you address the dispute, the better chance you have of protecting your cash flow and preserving the business relationship.

Why Financial Disputes Happen in Small Businesses

Small businesses often work with tight budgets, limited staff, and fast-moving schedules. That makes disputes more common than many owners expect.

A financial dispute may happen because of:

  • An unpaid invoice
  • A late payment
  • A billing error
  • A missed delivery
  • Damaged goods
  • Poor service quality
  • Misunderstood contract terms
  • A chargeback
  • A refund disagreement
  • A vendor overcharge
  • A client refusing to pay
  • A disagreement over completed work

Sometimes the issue is simple. A customer may have missed an invoice, or a vendor may have entered the wrong amount. Other times, the dispute is more serious and involves contract terms, service expectations, or claims that one side did not deliver what was promised.

Before you assume the other party is acting in bad faith, take time to review the facts. A calm review can prevent the situation from becoming more stressful than it needs to be.

Step 1: Identify the Exact Problem

Before contacting the other party, define the issue clearly. Avoid broad statements like “they owe us money” or “the invoice is wrong.” Be specific.

Ask yourself:

  • What amount is being disputed?
  • Which invoice, contract, or transaction is involved?
  • What date did the issue happen?
  • What did each side agree to?
  • What proof do we have?
  • What outcome do we want?
  • Is this a one-time issue or part of a larger pattern?

For example, instead of saying, “The vendor overcharged us,” write:

“The vendor charged $2,800 on invoice #4521, but the signed quote shows $2,200 for the same service.”

That kind of statement is easier to prove and easier to resolve.

Step 2: Gather Your Documents

Good documentation is one of the strongest tools a small business has during a dispute. The more organized your records are, the easier it is to show what happened.

Gather anything that supports your position, including:

  • Signed contracts
  • Purchase orders
  • Invoices
  • Billing statements
  • Receipts
  • Payment confirmations
  • Bank records
  • Emails
  • Text messages
  • Delivery receipts
  • Tracking numbers
  • Photos of damaged items
  • Work orders
  • Project notes
  • Chargeback notices
  • Customer approvals
  • Internal call notes

If the dispute involves a service, collect proof of what was completed. If it involves a product, collect proof of delivery, condition, quantity, or return attempts.

It also helps to create a short timeline. List the important dates, what happened, and who was involved. This keeps the discussion focused on facts instead of opinions.

Step 3: Review the Contract or Agreement

Before you reach out, check the contract, proposal, invoice terms, or signed agreement. Many disputes are easier to handle when the contract already explains what should happen.

Look for sections about:

  • Payment due dates
  • Late fees
  • Refunds
  • Cancellations
  • Delivery terms
  • Acceptance of work
  • Warranty limits
  • Dispute resolution
  • Mediation
  • Arbitration
  • Notice requirements
  • Chargeback policies
  • Attorney fees
  • Jurisdiction or venue

Some contracts require written notice before a claim can move forward. Others require mediation or arbitration before court. If you miss these requirements, you may weaken your position.

If there is no written contract, review emails, proposals, estimates, messages, and invoices. These may still help show what both sides expected.

Step 4: Contact the Other Party Calmly

Once you understand the issue and have your documents ready, contact the other party. The goal is not to accuse them. The goal is to start a clear conversation and offer a path toward resolution.

Keep your message short, factual, and professional.

Initial Outreach Script

Use this script for a vendor, client, or customer dispute:

Hi [Name], I’m reaching out about [invoice number, order number, or project name]. We noticed an issue with [briefly explain the issue]. I’ve attached the relevant documents for review. Can we discuss a correction or resolution this week?

This works because it is direct without sounding hostile. It also gives the other party a chance to respond before the issue escalates.

Example for an Incorrect Invoice

Hi [Name], invoice #[number] shows a charge of $[amount], but our signed agreement lists the total as $[amount]. I’ve attached the agreement and invoice for reference. Can you review and send a corrected invoice?

Example for an Unpaid Invoice

Hi [Name], I’m following up on invoice #[number], which was due on [date]. Please let us know when payment will be sent or if there is a concern we need to address.

Example for a Delivery Issue

Hi [Name], our records show that order #[number] was delivered short by [quantity or item]. I’ve attached the delivery receipt and photos. Can you confirm the correction or credit?

Step 5: Propose a Practical Solution

A strong dispute message does more than point out the problem. It also suggests a reasonable way to fix it.

Possible solutions include:

  • Correcting the invoice
  • Issuing a refund
  • Applying a credit
  • Replacing damaged goods
  • Completing unfinished work
  • Offering a partial payment
  • Creating a payment plan
  • Reducing fees
  • Extending a deadline
  • Using mediation
  • Splitting the disputed amount

The best offer depends on the relationship and the amount at stake. If the other party is a long-term client or vendor, a practical compromise may be better than a drawn-out fight.

Payment Plan Script

We acknowledge that $[amount] is owed. We can pay $[amount] by [date] and the remaining balance by [date]. Would that work to keep the account in good standing?

Partial Resolution Script

Based on the documents, we believe $[amount] is the correct balance. To resolve this quickly, we are willing to pay $[amount] by [date] if you confirm the account will be considered paid.

Mediation Script

If we are unable to agree directly, would you be open to using a neutral mediator? That may help us reach a fair solution without the time and cost of court.

Step 6: Put Every Agreement in Writing

Verbal agreements are risky. Even if both sides are honest, people forget details. Always confirm the agreement in writing before sending payment, closing a dispute, or continuing service.

Your written agreement should include:

  • Names of both parties
  • Invoice or account number
  • Agreed payment amount
  • Due dates
  • Refund or credit terms
  • Services or goods involved
  • What happens after payment is made
  • Whether either side releases further claims
  • Contact person for follow-up

Follow-Up Email Script

Per our call today, we agreed that [specific terms]. Please confirm in writing that these terms are correct. Once confirmed, we will [make payment, issue credit, update the invoice, deliver replacement goods, or take other action].

This simple email can prevent confusion later.

Negotiation Options for Small Business Disputes

Direct negotiation is usually the first and best option. It is faster, cheaper, and more flexible than legal action.

To negotiate effectively:

  • Stay calm
  • Stick to the documents
  • Avoid insults or threats
  • Offer realistic solutions
  • Ask what the other side needs
  • Set clear deadlines
  • Confirm all terms in writing

Try to focus on solving the business problem. If you expect to work with the person or company again, protect the relationship when possible.

When Mediation Makes Sense

Mediation can help when both sides are willing to talk but cannot agree. A mediator is a neutral third party who helps guide the discussion. The mediator does not usually force a decision. Instead, they help both sides find a workable solution.

Mediation may be useful when:

  • The relationship is worth preserving
  • The disputed amount is meaningful but not huge
  • Both sides have some valid concerns
  • Communication has stalled
  • Court would cost too much
  • The contract requires mediation first

Mediation can be less stressful and less expensive than a lawsuit. It can also help both parties reach a solution faster.

Arbitration vs. Small Claims Court

Some contracts include an arbitration clause. Arbitration is more formal than mediation. A neutral arbitrator reviews the case and makes a decision. In many cases, that decision is binding.

Small claims court is another option for simpler disputes. It is often used when the amount is within the state’s small claims limit and the issue is straightforward.

Small claims may be appropriate for:

  • Unpaid invoices
  • Simple contract disputes
  • Property damage
  • Failed refunds
  • Minor vendor disputes
  • Clear payment disagreements

Before filing, check your state’s small claims limits, filing rules, and business representation requirements. Some states allow business owners to appear without an attorney, while others have specific rules for companies.

When to Involve a CPA, Insurance Provider, or Attorney

Some disputes require outside help. You do not need to call a lawyer for every disagreement, but professional guidance may be important when the risk is high.

Consider contacting a CPA if:

  • The dispute affects revenue recognition
  • A settlement changes your books
  • There may be tax consequences
  • A bad debt write-off may be needed
  • A refund or credit affects reporting

Consider contacting your insurance provider if:

  • The dispute involves professional liability
  • A client claims your business caused financial harm
  • Property damage is involved
  • Your policy may cover defense costs
  • You received a formal demand letter

Consider contacting an attorney if:

  • The claim is large
  • The contract is complex
  • The other party threatens legal action
  • You are asked to sign a release
  • You received court papers
  • The dispute involves fraud allegations
  • The issue may affect your business license or reputation

Getting advice early may prevent a small dispute from becoming a larger problem.

How to Handle Chargebacks

Chargebacks can be frustrating because money may be pulled from your account before the full issue is reviewed. If a customer disputes a payment, respond quickly and provide strong evidence.

Helpful chargeback documents include:

  • Signed receipts
  • Delivery confirmation
  • Customer emails
  • Service completion records
  • Photos
  • Refund policy
  • Terms and conditions
  • Proof the customer approved the charge
  • Tracking details
  • Notes from customer communication

Chargeback Response Script

We dispute this chargeback. Attached are the signed receipt, delivery confirmation, customer approval, and service records showing the transaction was valid. Please review the attached documents and advise on the next steps.

Respond before the deadline. Missing the response window may cause you to lose the dispute automatically.

Record-Keeping Checklist

Keep a file for each financial dispute. This can be a digital folder, physical folder, or both.

Save these items:

  • Contract or signed agreement
  • Invoice or billing statement
  • Payment records
  • Delivery proof
  • Emails and texts
  • Call notes with names and dates
  • Photos or inspection reports
  • Chargeback records
  • Mediation notes
  • Settlement agreement
  • Court documents, if any
  • Final confirmation of resolution

Good records can help you collect money, defend against claims, and explain the issue to a CPA, attorney, bank, or insurer.

Common Mistakes to Avoid

Small business owners are busy, and disputes can be frustrating. Still, a few mistakes can make the issue worse.

Avoid these:

  • Ignoring the dispute
  • Responding emotionally
  • Making threats too early
  • Sending payment without written terms
  • Accepting verbal promises only
  • Missing chargeback deadlines
  • Failing to check the contract
  • Losing receipts or emails
  • Waiting too long to follow up
  • Escalating to court before trying reasonable solutions

A calm, organized approach usually gives you more control.

Prevention Tips for Future Contracts

The best dispute is the one you prevent before it starts. Strong contracts and clear policies can reduce confusion.

Add or improve terms covering:

  • Payment due dates
  • Late fees
  • Deposit requirements
  • Refund policies
  • Scope of work
  • Delivery expectations
  • Acceptance of goods or services
  • Change orders
  • Chargeback procedures
  • Mediation or arbitration
  • Attorney fees
  • Written notice requirements

Also consider using cloud storage for contracts, invoices, receipts, and customer approvals. Date-stamped records can make future disputes much easier to handle.

A Simple Action Plan for Business Owners

If you are dealing with a financial dispute right now, take these steps today:

  • Create a folder for the dispute
  • Add the invoice, contract, receipts, and messages
  • Write a short timeline of events
  • Review the contract for dispute terms
  • Contact the other party with a calm message
  • Attach proof
  • Propose a fair solution
  • Confirm all terms in writing
  • Set a follow-up date
  • Escalate only if informal steps fail

The goal is not just to win an argument. The goal is to protect your business, recover money when possible, and avoid wasting time on preventable conflict.

Protect Cash Flow Without Burning Bridges

Financial disputes can feel disruptive, but they do not have to control your business. Start with the facts, communicate clearly, and give the other party a reasonable chance to correct the issue. If that does not work, mediation, small claims court, insurance, or legal guidance may be the next step.

A professional process protects both your cash flow and your reputation. When you document the issue, respond quickly, and keep every agreement in writing, you give your business the best chance of resolving the dispute without unnecessary stress.

AI Content Disclosure

This article was generated via ChatGPT and reviewed for clarity, usefulness, and readability. It is intended for general informational purposes only and should not be considered legal, financial, tax, accounting, or professional business advice.

What Should I Say When I First Contact The Creditor to Negotiate?

What Should I Say When I First Contact The Creditor to Negotiate

Missing a payment can feel stressful, especially when the phone calls, letters, or emails start coming in. The good news is that your first conversation with a creditor does not have to be complicated. You do not need to sound like a lawyer, financial expert, or professional negotiator. You just need to be calm, prepared, and clear about what you can realistically do.

The question many people ask is simple: what should I say when I first contact the creditor to negotiate?

The best approach is to introduce yourself, confirm the account, explain your situation briefly, ask what options are available, and request everything in writing before you agree to anything. This guide gives you practical scripts, simple talking points, and a step-by-step process you can use before making the call or sending an email.

Key Takeaway

When you first contact a creditor, say who you are, provide your account number, briefly explain why you are having trouble paying, and ask about hardship plans, payment plans, reduced payments, or settlement options.

A simple opening line can sound like this:

“Hello, my name is [Name], and I’m calling about account number [account number]. I’ve had a recent financial hardship, and I would like to talk about options to bring this account current or work out a payment arrangement.”

Keep the conversation short, honest, and focused. Do not agree to a payment you cannot afford, and always ask for the terms in writing before making a final commitment.

Why the First Contact Matters

The first conversation can set the tone for everything that happens next. If you wait too long, the account may continue to collect late fees, interest, or additional penalties. In some cases, the creditor may send the account to a collection agency or report missed payments to the credit bureaus.

Contacting the creditor early shows that you are trying to address the issue. It also gives you a chance to learn what options are available before the situation becomes harder to manage.

Creditors may offer different solutions depending on your account, your payment history, and the type of debt. These options may include:

  • A temporary hardship plan
  • A lower monthly payment
  • A short-term pause or reduced payment arrangement
  • Waived late fees
  • A payment extension
  • A settlement for less than the full balance
  • A plan to bring the account current over time

Not every creditor will offer every option, but you will not know what is available until you ask.

Before You Call the Creditor

Preparation can make the conversation much easier. You do not want to be searching for documents or guessing what you can afford while the agent is on the phone.

Before you call, gather the following:

  • Your account number
  • A recent statement or billing notice
  • The creditor’s phone number or contact email
  • Your current balance, if available
  • Your monthly income estimate
  • Your basic monthly expenses
  • Proof of hardship, if you have it
  • A pen and paper or notes app
  • The amount you can pay today, if any
  • The amount you can reasonably pay each month

You should also decide ahead of time what you can afford. This is important because some agents may ask for a payment right away. You do not want to agree to something that will create another problem next month.

A realistic plan is better than an impressive promise you cannot keep.

What to Say at the Start of the Call

Your opening statement should be short and direct. You do not need to tell your entire life story. The goal is to explain why you are calling and ask for help reviewing your options.

First Contact Script

“Hello, my name is [Name], and I’m calling about account number [account number]. I’ve had a recent financial hardship due to [brief reason], and I’d like to discuss my options for getting this account back on track.”

This script works because it does three things:

  • Identifies who you are
  • Tells them which account you are calling about
  • Clearly asks for negotiation options

You can adjust the hardship reason based on your situation. For example:

  • Job loss
  • Reduced work hours
  • Medical bills
  • Family emergency
  • Divorce or separation
  • Temporary income loss
  • Unexpected expenses

Try to keep the explanation to one or two sentences. The creditor does not need every personal detail.

What to Ask the Creditor

Once you explain why you are calling, ask open-ended questions. This helps you learn what the creditor can offer before you start making promises.

Useful Questions to Ask

  • “What hardship options are available for this account?”
  • “Do you offer a temporary reduced payment plan?”
  • “Can any late fees be waived?”
  • “Is there a way to stop additional fees while I make payments?”
  • “Can the account be brought current through a payment arrangement?”
  • “Do you offer settlement options?”
  • “Will this arrangement affect credit reporting?”
  • “Can you send the terms in writing before I make a payment?”

These questions keep the conversation focused on solutions. They also help you avoid agreeing to something without understanding the terms.

Script for Asking About a Hardship Plan

A hardship plan may help if your financial problem is temporary. Some creditors offer hardship programs for people dealing with job loss, medical issues, reduced income, or other major financial challenges.

You can say:

“I’m going through a temporary hardship because of [brief reason]. Do you offer a hardship plan for this type of situation? If so, what documents do you need from me, and what are the terms?”

If they ask for proof, stay calm. They may request documents such as:

  • Pay stubs
  • Unemployment benefits letter
  • Medical bills
  • Bank statements
  • Termination letter
  • Proof of reduced income
  • Written explanation of hardship

Only send documents through official creditor channels. If you are unsure, ask them to provide the correct email address, upload portal, or mailing instructions in writing.

Script for Proposing a Payment Plan

If you can afford a monthly payment, be specific. Creditors are more likely to respond when you provide a clear number.

You can say:

“I can pay $[amount] today and $[amount] each month after that. Would that be enough to set up a payment plan and prevent additional late fees?”

Or:

“I cannot pay the full balance right now, but I can make consistent monthly payments of $[amount]. Can we set up a written payment arrangement based on that?”

Make sure the monthly amount is realistic. If you agree to a payment plan and miss the first or second payment, you may lose the arrangement.

Script for Requesting a Settlement

A settlement means the creditor agrees to accept less than the full balance to resolve the account. This may be an option if you have access to a lump sum but cannot pay the full amount.

You can say:

“I’m not able to pay the full balance, but I may be able to make a one-time payment of $[amount]. Would your company consider accepting that as a settlement to resolve the account?”

Before paying a settlement, ask important questions:

  • “Will this settle the full account balance?”
  • “Will I owe anything after this payment?”
  • “How will this be reported to the credit bureaus?”
  • “Can you send the settlement agreement in writing before I pay?”
  • “What date would the payment need to be made?”

Never make a settlement payment based only on a verbal promise. Get the agreement in writing first.

What to Say If They Ask for an Immediate Payment

Some agents may ask you to pay right away. If you can afford the amount and understand the terms, that may be fine. But if the amount is too high, do not panic.

You can say:

“I cannot make that payment today, but I can pay $[amount] now and $[amount] monthly. Is that something you can approve?”

If they continue pushing for more than you can afford, say:

“I understand that amount is due, but I do not want to agree to a payment I cannot keep. Can we review a lower payment option or a hardship plan?”

If needed, ask for a supervisor:

“I appreciate your help. Is there a supervisor or hardship department I can speak with to review other options?”

What to Document During the Call

Take notes during every call. If there is ever confusion later, your notes can help you remember what was said.

Write down:

  • Date and time of the call
  • Name of the person you spoke with
  • Agent ID number, if available
  • Phone number you called
  • What options were offered
  • Payment amounts discussed
  • Due dates
  • Fees or interest changes
  • Credit reporting information
  • Confirmation number, if provided
  • When written confirmation will be sent

Do not rely on memory. Debt conversations can be stressful, and it is easy to forget details afterward.

Ask for Everything in Writing

This is one of the most important parts of creditor negotiation. Verbal promises are not enough. Before you make a payment under a new agreement, ask for written confirmation.

You can say:

“Thank you. Before I make the payment, can you please send the full agreement in writing so I can review the terms?”

The written confirmation should include:

  • Account number
  • Payment amount
  • Due date
  • Number of payments
  • Total amount owed
  • Whether fees or interest are waived
  • Whether the payment settles the account
  • What happens if you miss a payment
  • How the account will be reported, if applicable

If the creditor will not provide the agreement in writing, be careful. You may want to pause and seek guidance before paying.

Follow-Up Email Script

After a phone call, it is smart to send a short email confirming what was discussed. This creates a written record.

Use this script:

“Hello, this message confirms my call on [date] with [agent name] regarding account number [account number]. We discussed [payment plan, hardship plan, settlement, or other terms]. Please send written confirmation of the agreement, including payment amount, due date, and any changes to fees, interest, or account status. Thank you.”

Keep the email simple. You are not trying to argue. You are creating a record.

Common Mistakes to Avoid

Many people make the first call when they are nervous, embarrassed, or overwhelmed. That is normal. Still, there are a few mistakes you should try to avoid.

Do Not Agree to a Payment You Cannot Afford

It may feel good to get the creditor off the phone, but agreeing to an unrealistic payment can make things worse. Be honest about what you can pay.

Do Not Give Too Much Personal Detail

You can explain the hardship without sharing every private detail. A short explanation is enough.

Do Not Ignore the Terms

Ask what happens if you miss a payment, whether fees continue, and whether the agreement affects credit reporting.

Do Not Make a Settlement Payment Without Written Confirmation

A settlement should be clearly documented before money changes hands.

Do Not Let Pressure Control the Conversation

Stay calm. If you feel rushed, ask for time to review the offer.

You can say:

“I need 24 hours to review this. Can I call back tomorrow, and can you note the offer on my account?”

Quick Example Conversation

Here is what a simple call might sound like.

You: “Hello, my name is Maria, and I’m calling about account number 12345. I lost work last month and need to discuss options for getting this account back on track.”

Creditor: “How much can you pay today?”

You: “I can pay $25 today and $75 per month starting next month. Do you have a hardship plan or payment arrangement that would work with that amount?”

Creditor: “We may be able to offer a payment plan.”

You: “Thank you. Can you explain the terms, including whether fees will continue and whether I can get the agreement in writing before I make the payment?”

This kind of conversation is simple, calm, and direct. You are not begging. You are asking for options.

Helpful Phrases to Keep Nearby

Before you call, write down a few phrases so you do not freeze during the conversation.

Use these when needed:

  • “Can you explain that in simpler terms?”
  • “Can you repeat the payment amount and due date?”
  • “Will this stop late fees?”
  • “Will interest continue during the plan?”
  • “How will this be reported?”
  • “Can you send that in writing?”
  • “I cannot afford that amount, but I can offer this instead.”
  • “I need time to review the terms before agreeing.”
  • “Is there a hardship department I can speak with?”
  • “Can you note this conversation on my account?”

These phrases help you stay in control without sounding aggressive.

What If the Account Is With a Debt Collector?

If the account is no longer with the original creditor and has been sent to a debt collector, be extra careful. You can still ask about payment plans or settlement options, but you should also ask for written details about the debt.

You can say:

“Before discussing payment, can you send written information about the debt, including the original creditor, balance, and account details?”

You may also want to keep communication in writing if you feel uncomfortable on the phone.

Simple Checklist Before You Agree

Before you agree to any plan, make sure you know:

  • The exact payment amount
  • The exact payment due date
  • Whether payments are one-time or recurring
  • Whether fees or interest will continue
  • Whether the account will be considered current, settled, or still past due
  • Whether the creditor will send written confirmation
  • What happens if you miss a payment
  • Who to contact if your situation changes

If any of these details are unclear, ask questions before paying.

Take the First Step With a Simple Script

The first call is usually the hardest part. You may feel embarrassed, frustrated, or worried about what the creditor will say. But a calm, prepared conversation can give you options and help you avoid making the situation worse.

Start with this:

“Hello, my name is [Name], and I’m calling about account number [account number]. I’m having trouble making the full payment right now, but I want to work toward a solution. What options are available?”

That one sentence is enough to begin. From there, listen carefully, take notes, ask questions, and get the agreement in writing before you commit.

AI Content Disclosure

This article was generated via ChatGPT and reviewed for clarity, usefulness, and reader value. It is intended for informational purposes only and should not be taken as legal, financial, or credit counseling advice.

Can You Reopen a Closed Insurance Claim?

Can You Reopen a Closed Insurance Claim

Finding more damage after an insurance claim has already been closed can feel frustrating. You may think the process is over, the payment has been made, and there is nothing else you can do. In many cases, that is not true.

A closed insurance claim is not always the end of the road. If you discover new damage, find out the original estimate missed something, or believe the settlement was incorrect, you may be able to ask the insurance company to reopen the claim. The key is to act quickly, document everything, and contact the insurer in writing.

Insurance companies usually want proof. They need to see why the claim should be reviewed again. That means dated photos, contractor estimates, repair invoices, inspection notes, and any documents showing what was missed the first time.

Reopening a claim is not guaranteed, but a clear and organized request can make a big difference.

Key Takeaway

Yes, you can often reopen a closed insurance claim if there is new damage, missed damage, an incorrect payment, or a mistake in the original claim review.

To give yourself the best chance:

  • Find your claim number and original settlement documents
  • Take dated photos and videos of the damage
  • Get a contractor estimate or inspection report
  • Contact your adjuster in writing
  • Ask for a reinspection
  • Keep notes of every phone call, email, and letter
  • Request a written explanation if the insurer refuses
  • Escalate to a supervisor, appraisal, state insurance department, or attorney if needed

Do not wait too long. The sooner you report the issue, the easier it is to connect the damage to the original claim.

What Does It Mean to Reopen a Closed Insurance Claim?

Reopening a closed insurance claim means asking the insurance company to review the claim again after it has already been marked closed. This may happen when new information becomes available or when the original claim did not fully address the covered loss.

A claim may be closed after the insurer issues payment, denies the claim, or decides no further action is needed. However, closure does not always mean the issue is permanently finished.

For example, a homeowner may file a storm damage claim, receive payment for roof repairs, and later discover water damage inside the attic. A driver may settle an auto claim, then find out the vehicle has hidden frame damage. A business owner may close a property claim, then receive a contractor report showing the original estimate missed required repairs.

In these situations, reopening the claim may allow the insurer to review the additional information and decide whether more coverage applies.

Common Reasons to Reopen a Closed Insurance Claim

There are several reasons a policyholder may ask an insurer to reopen a claim. The most common reason is discovering damage that was not visible during the first inspection.

New Damage Found After Repairs Begin

Some damage is hidden until repairs start. For example, a contractor may remove drywall and find mold, water damage, or structural problems that were not visible during the first inspection.

This can happen with:

  • Roof leaks
  • Plumbing failures
  • Fire damage
  • Smoke damage
  • Water intrusion
  • Mold growth
  • Storm damage
  • Foundation issues
  • Vehicle damage

If the new damage appears connected to the original loss, you should report it as soon as possible.

Missed Scope in the Original Estimate

Sometimes the adjuster may not include every repair needed. This does not always mean the adjuster acted unfairly. It may simply mean the damage was hard to see or the full repair scope was not clear at the time.

Examples of missed scope may include:

  • Missing materials
  • Incorrect measurements
  • Labor that was not included
  • Code-required repairs
  • Hidden damage
  • Replacement items listed as repair only
  • Damage in nearby rooms or areas

A contractor estimate can help show what was missed.

Incorrect Payment Amount

You may also ask to reopen a claim if you believe the payment was too low or calculated incorrectly. This can happen because of pricing errors, missing line items, depreciation issues, deductible confusion, or incorrect coverage interpretation.

Review the settlement letter carefully. Compare the insurer’s estimate with your contractor’s estimate and your policy terms.

Repairs Did Not Solve the Problem

In some cases, repairs may be completed, but the original issue continues. For example, a roof repair may not stop the leak, or a water damage repair may not address the source of moisture.

If the continuing problem is related to the original covered loss, notify your insurer and provide proof.

Clerical Errors or New Information

Claims may also be reopened due to paperwork mistakes, missing documents, or new evidence. If the insurer made a clerical error or did not review important information, you can request another look.

How Soon Should You Ask to Reopen the Claim?

Act as quickly as possible. The strongest time to ask for a claim to be reopened is usually within days or weeks of discovering the issue.

Waiting too long can create problems because:

  • Evidence may disappear
  • Damage may get worse
  • The insurer may question the cause
  • Repairs may cover up important proof
  • Witnesses or contractors may forget details
  • Policy deadlines may apply

There is no single rule that applies to every claim. Timing can depend on the policy, the state, the type of insurance, and the reason for reopening. Some disputes may still be possible later, but it is always better to act early.

If you discover new or missed damage, do not wait months to report it. Take photos, get an estimate, and contact your adjuster in writing right away.

Steps to Reopen a Closed Insurance Claim

Reopening a claim works best when you follow a clear process. The goal is to make it easy for the insurer to understand what happened and why the file should be reviewed again.

Step 1: Locate Your Claim Documents

Start by gathering your original claim paperwork. You will need the claim number, adjuster contact information, settlement letter, repair estimate, and payment details.

Look for:

  • Claim number
  • Policy number
  • Original inspection report
  • Settlement letter
  • Payment breakdown
  • Photos from the original claim
  • Emails or letters from the adjuster
  • Repair invoices
  • Contractor notes

Keep everything in one folder so it is easy to send when needed.

Step 2: Document the New or Missed Damage

Take clear photos and videos before making additional repairs, unless repairs are needed to prevent more damage. Use wide shots and close-up shots.

Your documentation should include:

  • Date-stamped photos
  • Videos showing the affected area
  • Photos from multiple angles
  • Before and after repair photos, if available
  • Notes explaining when you found the damage
  • Photos showing the surrounding area
  • Any signs that connect the damage to the original loss

If your phone does not automatically show dates on photos, keep the original files and write down when the photos were taken.

Step 3: Get a Contractor Estimate

A contractor estimate can make your request stronger. Ask the contractor to explain what was missed and why the additional work is necessary.

A helpful estimate should include:

  • Contractor name and contact details
  • Date of inspection
  • Description of the damage
  • Repair scope
  • Materials and labor needed
  • Cost breakdown
  • Photos, if available
  • Explanation of how the damage relates to the original claim

If the issue is complex, you may need a specialist. For example, a roofer, plumber, engineer, mold inspector, mechanic, or restoration contractor may be helpful depending on the claim.

Step 4: Contact the Adjuster in Writing

A phone call can be useful, but your reopen request should be in writing. Email is often the easiest option because it creates a record. Certified mail may also be helpful for important requests.

Your message should be short, factual, and supported by attachments.

Use this script:

Hello, this is [Name], and I am contacting you about claim #[claim number]. I recently discovered additional damage related to the original claim. I have attached dated photos and a contractor estimate showing the issue. Please reopen the claim for review and schedule a reinspection.

Keep your tone calm and professional. Do not accuse the adjuster or insurer. Focus on the facts.

Step 5: Ask for a Reinspection

A reinspection allows the insurer to look at the damage again. If an adjuster visits the property or vehicle, be present if possible. Have your photos, estimates, and documents ready.

During the reinspection:

  • Show the new or missed damage
  • Explain when you discovered it
  • Provide contractor notes
  • Ask what the next steps are
  • Take notes during the visit
  • Ask when you should expect a response

After the reinspection, send a follow-up email summarizing what was discussed.

Sample Follow-Up Email

If you do not hear back after sending your reopen request, follow up politely.

Hello, I am following up on my request to reopen claim #[claim number]. I sent photos and a contractor estimate on [date]. Please confirm receipt and let me know the next steps within five business days.

If the adjuster does not respond, ask for a supervisor review.

Hello, I am requesting a supervisor review for claim #[claim number]. The original estimate appears to have missed covered damage, and I have provided photos and a contractor estimate documenting the issue. Please confirm who will be reviewing this request.

What Proof Will Help Your Request?

The stronger your proof, the better your chance of getting the claim reviewed again.

Helpful evidence may include:

  • Dated photos and videos
  • Contractor estimates
  • Repair invoices
  • Inspection reports
  • Original claim documents
  • Before and after photos
  • Expert statements
  • Emails from contractors
  • Receipts for materials
  • Notes from calls with the insurer
  • Weather reports, if relevant
  • Maintenance records, if relevant

The goal is to show that the damage is real, connected to the original claim, and not a separate issue caused later.

What If the Insurance Company Refuses?

If the insurer refuses to reopen the claim, ask for the decision in writing. A written response helps you understand the reason and gives you a record if you need to escalate.

Ask:

  • Why was the request denied?
  • What policy language applies?
  • What evidence was reviewed?
  • Can a supervisor review the decision?
  • Is appraisal available under the policy?
  • What is the appeal or dispute process?

Do not accept a vague verbal answer. Ask the insurer to explain the denial clearly.

Escalation Options If the Claim Is Denied

If you believe the insurer is wrong, you may have several options.

Request a Supervisor Review

Sometimes a supervisor can review the claim and reconsider the decision. Send a written request with all supporting documents.

Use the Appraisal Process

Some insurance policies include an appraisal clause. Appraisal is often used when the insurer and policyholder disagree about the amount of loss. Independent appraisers review the damage and help determine the value.

Appraisal may not solve coverage disputes, but it can help when the main disagreement is the repair amount.

File a State Insurance Complaint

If you believe the insurer handled the claim unfairly, you may be able to file a complaint with your state insurance department. Regulators can review claim-handling concerns and request a response from the insurer.

Consider Legal Advice

For larger disputes, repeated denials, or suspected bad faith, speak with an attorney who handles insurance claims. Legal advice can be especially important before signing releases or giving up rights.

Mistakes to Avoid

Avoid these common mistakes when trying to reopen a closed claim:

  • Waiting too long to report the issue
  • Making major repairs before taking photos
  • Throwing away receipts or damaged materials
  • Relying only on phone calls
  • Sending emotional or angry messages
  • Guessing about the cause of damage
  • Signing a full release too soon
  • Accepting final payment without reviewing the damage
  • Failing to get contractor estimates
  • Ignoring policy deadlines

Stick to facts and evidence. That approach is more effective than frustration or blame.

Record-Keeping Checklist

Keep these records until the claim is fully resolved. For important claims, keep them even longer.

  • Original claim number
  • Policy number
  • Settlement letter
  • Original estimate
  • Photos and videos
  • Contractor estimates
  • Repair invoices
  • Payment records
  • Emails and letters
  • Certified mail receipts
  • Call notes with names and dates
  • Reinspection notes
  • Denial letters
  • Appraisal documents
  • Complaint filings

Good records can help if the insurer delays, denies the request, or reports inconsistent information later.

A Quick Example

Imagine a homeowner named Miguel who filed a storm damage claim after heavy rain. The insurer inspected the roof and paid for a small repair. Two weeks later, Miguel noticed soft drywall and water stains inside a bedroom closet.

Instead of waiting, he took photos, called a roofer, and got an estimate showing water intrusion from the same damaged roof area. He emailed the adjuster with the claim number, photos, and estimate. The insurer reopened the claim, scheduled a reinspection, and reviewed the additional damage.

The important part is that Miguel acted quickly and supported his request with proof.

Keep the Claim Moving With Written Proof

A closed claim does not always mean the insurance company will refuse to look again. If you discover new damage or believe something was missed, move quickly and keep everything in writing.

Start with the basics:

  • Find your claim number
  • Take dated photos
  • Get a contractor estimate
  • Email the adjuster
  • Ask for reinspection
  • Keep detailed records
  • Escalate if the insurer refuses without a clear reason

The more organized you are, the easier it is to show why the claim deserves another review. A calm written request, strong documentation, and quick follow-up can help protect your rights and give the insurer the information needed to reconsider the claim.

AI Content Disclosure

This article was generated via ChatGPT and reviewed for clarity, usefulness, and readability. It is provided for general informational purposes only and should not be considered legal, insurance, financial, or professional claim advice.

Should You Hire a Debt Settlement Company?

Should You Hire a Debt Settlement Company

Debt can feel overwhelming when credit card bills, medical balances, personal loans, and collection notices keep piling up. When monthly payments are no longer manageable, it is natural to look for a way to reduce what you owe and get some breathing room.

That is where debt settlement companies often enter the picture. They may advertise that they can negotiate with creditors and help you settle debts for less than the full balance. For some people, this can sound like a lifeline. For others, it can create new problems if they do not fully understand the risks.

Before hiring a debt settlement company, you need to know how the process works, what it may cost, how it can affect your credit, and what alternatives might be available. Debt settlement is not a quick fix, and it is not the right choice for everyone.

Key Takeaway

You may want to consider a debt settlement company if you have large unsecured debt, cannot afford your monthly payments, and understand the possible consequences, including damaged credit, fees, lawsuits, and possible tax issues.

Before signing with any company, compare all your options first:

  • Negotiating with creditors yourself
  • Working with a nonprofit credit counseling agency
  • Using a debt management plan
  • Applying for a debt consolidation loan
  • Speaking with a bankruptcy attorney
  • Reviewing your budget to see if a direct payment plan is possible

Debt settlement may reduce what you pay to creditors, but it can also create serious short-term and long-term consequences. The best decision is the one you make after reviewing the full picture, not just the promise of a lower balance.

How Debt Settlement Works

Debt settlement is a process where a company tries to negotiate with your creditors so they accept less than the full amount you owe. This usually applies to unsecured debts, such as credit cards, medical bills, personal loans, or certain collection accounts.

In many debt settlement programs, you stop making payments directly to your creditors. Instead, you deposit money into a dedicated account. After enough money builds up, the settlement company contacts your creditors and offers a lump-sum payment or structured settlement.

If the creditor accepts, the debt may be marked as settled. You then pay the agreed settlement amount, and the debt settlement company charges its fee.

The process often works like this:

  • You enroll eligible debts into the program
  • You stop or pause direct creditor payments
  • You make regular deposits into a settlement savings account
  • The company waits until funds build up
  • The company negotiates with creditors
  • A settlement offer is made
  • You approve or reject the proposed agreement
  • Funds are paid if the settlement is accepted
  • The company collects its fee after a settlement is reached

This process can take time. Many programs last 18 to 36 months, and some take longer depending on the amount of debt, creditor cooperation, and how quickly you can build up settlement funds.

What Types of Debt Usually Qualify?

Debt settlement is usually designed for unsecured debt. This means there is no collateral attached to the debt.

Common examples include:

  • Credit card debt
  • Medical bills
  • Personal loans
  • Some private collection accounts
  • Certain unpaid utility or service accounts

Debt settlement usually does not work well for secured debts. A secured debt is tied to property that can be repossessed or foreclosed on if you do not pay.

Examples that usually do not fit debt settlement include:

  • Mortgage loans
  • Car loans
  • Equipment loans secured by business assets
  • Certain student loans
  • Tax debt
  • Court judgments
  • Child support obligations

Before enrolling any account, ask the company which debts qualify and which debts do not. You should also ask whether each creditor has a history of settling.

When Hiring a Debt Settlement Company Might Make Sense

Debt settlement may make sense in limited situations. It is usually considered when a person is already behind, cannot keep up with monthly payments, and wants to avoid bankruptcy if possible.

You may be a possible candidate if:

  • You have a significant amount of unsecured debt
  • Your minimum payments are no longer affordable
  • You have already missed payments or are close to missing them
  • You can set aside money each month for settlements
  • You understand that your credit may be damaged
  • You are prepared for collection calls or letters
  • You accept that creditors are not required to settle
  • You are willing to wait months or years for results

Some people consider settlement when their debt is over $10,000, but the right threshold depends on your income, expenses, and creditor situation. A smaller balance may be easier to negotiate on your own, while a larger balance may require more planning.

Benefits of Debt Settlement

Debt settlement can have benefits if the process goes well and the company is reputable. The biggest appeal is that you may pay less than the full balance owed.

Possible benefits include:

  • Reduced payoff amounts on some accounts
  • One structured program instead of multiple creditor calls
  • Help from negotiators who understand creditor settlement processes
  • A possible alternative to bankruptcy
  • A path toward resolving debts that are already unaffordable
  • Fewer active collection accounts after settlements are completed

For someone who is already behind and cannot realistically repay the full balance, a successful settlement may bring relief. It can also help close accounts that have been sitting unresolved.

Risks of Debt Settlement

The risks are just as important as the potential benefits. Debt settlement can hurt your credit, increase fees, and expose you to collection activity while the process is happening.

Possible risks include:

  • Credit score damage from missed payments
  • Late fees and interest adding to balances
  • Collection calls continuing during the process
  • Creditors refusing to settle
  • Creditors filing lawsuits
  • Company fees reducing your actual savings
  • Possible tax forms for forgiven debt
  • Long program timelines
  • No guarantee that all debts will be settled

Many people do not realize that the balance can continue growing while they wait for a settlement. If interest, penalties, and fees continue to add up, your final savings may be smaller than expected.

How Debt Settlement Can Affect Your Credit

Debt settlement can have a serious impact on your credit, especially if the process requires you to stop making payments. Missed payments may be reported to the credit bureaus, and accounts may become charged off or sent to collections.

A settled account can look better than an unpaid account, but it may still be less favorable than paying in full.

Credit reports may show terms such as:

  • Settled
  • Settled for less than full balance
  • Paid settlement
  • Charged off
  • Account closed
  • Collection account paid or settled

The effect depends on your credit history before settlement, how late the accounts become, and how the creditor reports the final status.

Over time, the impact may lessen, especially if you keep other accounts current and avoid new missed payments. However, debt settlement is not usually a credit repair strategy. It is mainly a debt resolution strategy.

Costs and Fees to Watch For

Debt settlement companies charge fees for their service. These fees can vary, so you need to understand the full cost before signing.

Common fee structures include:

  • A percentage of the enrolled debt
  • A percentage of the amount saved
  • Flat fees
  • Fees charged only after a settlement is completed

You should ask for a written fee estimate before enrolling. Do not rely on vague promises like “we only get paid when you save money.” Ask exactly how the fee is calculated and when it is collected.

Also consider hidden or indirect costs, such as:

  • Late fees
  • Interest charges
  • Collection costs
  • Legal costs if a creditor sues
  • Tax consequences from forgiven debt
  • Bank account or payment processing fees

A settlement may still save money, but the savings should be calculated after fees and possible tax effects.

Tax Issues After Debt Settlement

If a creditor forgives part of your debt, the forgiven amount may be reported as canceled debt. In some cases, you may receive a Form 1099-C if $600 or more is forgiven.

This does not always mean you will owe taxes, but it does mean you should take the issue seriously. Some people may qualify for exceptions, such as insolvency or bankruptcy-related exclusions.

If you receive a 1099-C, speak with a qualified tax professional. Keep all settlement documents, payment records, and tax forms in one place.

Important documents to save include:

  • Settlement agreement
  • Proof of payment
  • Creditor letters
  • Final account confirmation
  • 1099-C forms
  • Credit report screenshots before and after settlement

Red Flags When Choosing a Debt Settlement Company

Not every company is trustworthy. Some companies make promises they cannot keep or pressure people into programs that are not a good fit.

Watch for these warning signs:

  • Demands for large fees before any settlement happens
  • Guaranteed results
  • Promises to eliminate all debt
  • Claims that lawsuits cannot happen
  • Pressure to sign immediately
  • No written contract
  • Vague fee details
  • No clear cancellation policy
  • Refusal to explain risks
  • Poor complaint history
  • No clear contact person
  • Promises that sound too good to be true

A reputable company should clearly explain both the benefits and risks. If the sales pitch only focuses on savings and avoids credit damage, legal risk, or tax issues, be careful.

Questions to Ask Before You Sign

Before signing with a debt settlement company, ask direct questions and request written answers.

Use this checklist:

  • What debts qualify for the program?
  • Which creditors do you commonly work with?
  • What is the estimated timeline?
  • How are your fees calculated?
  • When are fees collected?
  • What happens if a creditor refuses to settle?
  • What happens if I am sued?
  • Will I still receive collection calls?
  • Where will my settlement funds be held?
  • Can I cancel the program?
  • What fees apply if I cancel?
  • What are the credit consequences?
  • Could I receive a 1099-C?
  • Can I review the contract before signing?
  • Can you provide sample settlement documents?

If the company avoids these questions, that is a warning sign.

Script to Vet a Debt Settlement Company

You can use this short script when calling or emailing a company:

Hi, I’m considering debt settlement for about $[amount] in unsecured debt. Can you send me a written fee estimate, expected timeline, cancellation policy, and explanation of the risks? Also, do you charge any fees before a settlement is reached?

This simple message helps you see how transparent the company is. A trustworthy company should be willing to provide clear written information.

Alternatives to Hiring a Debt Settlement Company

Before choosing debt settlement, compare it with other options. A different path may cost less, protect your credit better, or resolve the problem faster.

DIY Negotiation

You can contact creditors yourself and ask for a payment plan, hardship program, reduced interest rate, or settlement. This takes time, but it may save money because you avoid company fees.

DIY negotiation may work well if:

  • You have a lump sum available
  • You are comfortable calling creditors
  • You can stay organized
  • You want more control over the process

Nonprofit Credit Counseling

A nonprofit credit counseling agency may help you review your budget and set up a debt management plan. In a debt management plan, creditors may lower interest rates or waive certain fees while you make one monthly payment.

This may be a better fit if you want to repay your debts without the same level of credit damage caused by missed payments.

Debt Consolidation Loan

A debt consolidation loan combines multiple debts into one payment. This may help if you qualify for a lower interest rate and can afford the payment.

This option may not work if your credit is already damaged or your income is too low to qualify.

Bankruptcy

Bankruptcy is a legal process that may discharge certain debts or create a structured repayment plan. It has serious credit consequences, but for some people, it may be faster and more protective than debt settlement.

If your debts are overwhelming, speaking with a bankruptcy attorney may help you understand whether this option should be considered.

Common Mistakes to Avoid

Many people enter debt settlement too quickly because they feel desperate. Slow down and avoid these mistakes:

  • Signing without reading the contract
  • Stopping payments without a clear plan
  • Ignoring lawsuit risks
  • Assuming all creditors will settle
  • Forgetting about taxes on forgiven debt
  • Choosing a company based only on ads
  • Not comparing alternatives
  • Not checking complaint history
  • Giving broad power of attorney without understanding it
  • Failing to save documents

A little research before signing can prevent major problems later.

A Realistic Example

Suppose a person has $25,000 in credit card debt and cannot keep up with minimum payments. A settlement company may try to settle several accounts for 40 percent to 60 percent of the balance.

That might sound like a big savings, but the full picture matters. During the program, late fees and interest may grow. Credit scores may drop because payments are missed. The company may charge a fee. A creditor may refuse to settle or may file a lawsuit. If debt is forgiven, tax paperwork may arrive later.

In a best-case outcome, the person resolves the debt for less than the original balance and avoids bankruptcy. In a worse outcome, the person faces damaged credit, extra fees, legal pressure, and no settlement on certain accounts.

That is why debt settlement should be evaluated carefully.

A Smarter Way to Decide

Hiring a debt settlement company is a serious decision. It may help if you have large unsecured debt and no realistic way to keep up with payments. It may also create stress if you are not prepared for credit damage, fees, collection activity, and possible tax issues.

Before signing, take these steps:

  • List every debt and balance
  • Review your monthly budget
  • Check whether you can negotiate directly
  • Contact a nonprofit credit counselor
  • Compare consolidation options
  • Speak with a bankruptcy attorney if needed
  • Get written estimates from settlement companies
  • Review all fees, risks, and cancellation terms
  • Take a few days before signing anything

A debt settlement company may be the right choice for some people, but it should never be chosen based only on promises of saving money. The better approach is to compare every option and make the decision with clear expectations.

AI Content Disclosure

This article was generated via ChatGPT and reviewed for clarity, usefulness, and readability. It is intended for general informational purposes only and should not be treated as legal, financial, tax, credit, or debt counseling advice.

When to Hire a Settlement Attorney?

A woman lawyer sits in the office of her law firm

You open a letter and see a demand for payment. Or maybe the other side sends a settlement number that makes you pause and wonder, “Is that even fair?”

It is a stressful moment. You want the problem handled quickly, but you also do not want to make a costly mistake. Should you negotiate on your own? Should you call an attorney right away? Is hiring legal help worth the cost?

The answer depends on the size of the dispute, the risks involved, and how complicated the situation has become. Knowing when to hire a settlement attorney can help you protect your money, your rights, and your peace of mind.

Key Takeaway

You should consider hiring a settlement attorney when the dispute involves significant money, unclear legal rights, complex contract language, lawsuit threats, aggressive tactics, or a settlement agreement that could affect your future.

A settlement attorney can help you:

  • Understand your legal position
  • Evaluate whether an offer is fair
  • Negotiate better terms
  • Avoid signing risky language
  • Protect yourself from future claims
  • Document the agreement properly
  • Respond to threats or deadlines with confidence

If the amount is small, the facts are simple, and the other side is cooperative, you may be able to handle the negotiation yourself. But when the stakes rise, legal guidance can make a major difference.

What Is a Settlement Attorney?

A settlement attorney is a lawyer who helps people and businesses resolve disputes without going to trial.

Their role is not only to argue. A good settlement attorney helps you understand the dispute, assess your risks, create a negotiation strategy, and put the final agreement in writing.

In simple terms, a settlement attorney helps answer questions like:

  • What is this claim really worth?
  • Am I legally responsible?
  • Is the other side’s offer reasonable?
  • What should I say in response?
  • What terms should I avoid?
  • Can this agreement hurt me later?
  • What happens if I do not settle?

The attorney’s job is to protect your rights, your money, and your future options.

Why Timing Matters

Many people wait too long before calling an attorney. They try to handle the issue themselves, respond emotionally, or sign something just to make the pressure stop.

That can create problems.

If you involve a settlement attorney early, they may be able to:

  • Prevent bad language from entering the agreement
  • Stop you from admitting liability unnecessarily
  • Preserve important evidence
  • Respond before deadlines pass
  • Improve your leverage
  • Reduce the risk of future disputes
  • Help you avoid overpaying or accepting too little

You do not always need full representation. Sometimes even one consultation can help you understand your options before making a decision.

Red Flags That Mean You Should Hire a Settlement Attorney

Some situations are too risky to handle casually. If any of the following signs appear, it may be time to get legal help.

1. A Lawsuit Has Been Threatened or Filed

If the other side threatens to sue, sends a formal legal notice, or has already filed court papers, take it seriously.

Legal deadlines can move fast. Missing a response deadline can hurt your position, even if you have a strong argument.

A settlement attorney can help you:

  • Review the legal papers
  • Identify deadlines
  • Respond appropriately
  • Negotiate from a stronger position
  • Avoid saying something that harms your case

2. A Large Amount of Money Is at Stake

The more money involved, the more important it is to get the settlement right.

Even a small mistake can become expensive when the dispute involves thousands or tens of thousands of dollars.

For example, if a settlement is off by 10 percent on a $100,000 dispute, that difference could cost you $10,000. In that kind of situation, paying for legal guidance may be a smart investment.

3. Liability Is Unclear

Sometimes it is not obvious who is responsible.

Maybe both sides made mistakes. Maybe the facts are incomplete. Maybe the contract does not clearly explain who owes what. When liability is unclear, negotiation becomes more complicated.

An attorney can help review:

  • Contract terms
  • Payment obligations
  • Evidence
  • Emails and written communications
  • Prior conduct between the parties
  • Possible defenses
  • Potential exposure

This helps you negotiate based on facts and legal risk, not fear.

4. The Contract Language Is Complicated

Contracts can include language that affects your rights in ways that are not obvious at first.

A settlement attorney can help explain terms related to:

  • Release of claims
  • Confidentiality
  • Non-disparagement
  • Indemnity
  • Default
  • Attorney fees
  • Interest
  • Payment deadlines
  • Future obligations
  • Enforcement

This matters because signing the wrong language can create new problems even after the original dispute is resolved.

5. The Other Side Is Using Aggressive Tactics

If the other side is pressuring you, threatening you, or refusing to put terms in writing, slow down.

Aggressive tactics may include:

  • Demanding immediate payment
  • Threatening legal action without explanation
  • Refusing to provide documents
  • Changing terms repeatedly
  • Using confusing language
  • Pushing you to sign quickly
  • Refusing to discuss fair alternatives
  • Asking for payment before a written agreement exists

An attorney can help level the playing field and keep the process professional.

6. You Need a Strong Release

A release is one of the most important parts of a settlement agreement.

It should clearly state which claims are being resolved and whether either side can bring future claims related to the dispute.

Weak or vague release language can leave you exposed. A settlement attorney can draft or review the release so you know exactly what you are giving up and what protections you are receiving.

Quick Checklist: Signs You Should Hire a Settlement Attorney

You should strongly consider legal help if:

  • A lawsuit has been threatened
  • Court papers have been filed
  • The settlement amount is more than you are comfortable risking
  • Liability is disputed
  • Contract language is unclear
  • The other side has an attorney
  • You feel pressured to sign quickly
  • The agreement includes a broad release
  • You do not understand the proposed terms
  • The other side refuses written confirmation
  • Future business, credit, reputation, or legal rights may be affected

When You May Be Able to Negotiate Alone

Not every dispute requires an attorney.

You may be able to handle the negotiation yourself if the issue is simple, the amount is small, and the other side is acting reasonably.

For example, you may not need a lawyer for:

  • A small billing error
  • A clear overcharge
  • A minor invoice dispute
  • A simple refund issue
  • A low-dollar payment disagreement
  • A misunderstanding that can be fixed with documents

If you decide to negotiate on your own, follow a few basic rules.

Do This:

  • Keep all communication professional
  • Save every email, text, and letter
  • Ask for proof of the amount claimed
  • Get all terms in writing
  • Confirm who has authority to settle
  • Read the agreement carefully before signing
  • Keep copies of payment receipts

Avoid This:

  • Do not pay before you have written terms
  • Do not rely on verbal promises
  • Do not sign vague releases
  • Do not admit fault unnecessarily
  • Do not ignore deadlines
  • Do not let pressure force a rushed decision

Even if you negotiate alone, you can still ask an attorney to review the final agreement before you sign.

Cost vs Value: When Hiring an Attorney Pays Off

One of the biggest concerns people have is cost. That is understandable. No one wants to spend money unnecessarily.

But the better question is not only, “How much will the attorney cost?”

The better question is, “What value can the attorney protect or create?”

Settlement attorneys may charge in different ways, including:

  • Hourly fees
  • Flat fees
  • Contingency fees
  • Limited-scope review fees
  • Consultation fees

The right fee structure depends on the type of dispute.

Simple Example

Suppose the other side offers you $30,000, but you believe the claim is worth $50,000. A lawyer negotiates the amount to $45,000.

If the attorney charges a 25 percent contingency fee, you receive $33,750 before any additional costs. That is still more than the original $30,000 offer.

In that case, hiring the attorney may pay off.

But the math can work differently in other situations. That is why you should compare:

  • The amount at stake
  • The fee structure
  • The strength of your case
  • The risk of losing
  • The time involved
  • The value of avoiding future problems

A lawyer may also provide value by reducing what you owe, improving payment terms, removing penalties, or protecting you from future claims.

What a Settlement Attorney Does Step by Step

A settlement attorney does much more than send letters. Their work usually follows a practical process.

Step 1: Intake and Evaluation

The attorney reviews the facts and documents to understand the dispute.

They may look at:

  • Contracts
  • Invoices
  • Emails
  • Letters
  • Payment records
  • Prior offers
  • Legal notices
  • Court documents
  • Timelines
  • Evidence from both sides

Then they help estimate your risk, exposure, and possible settlement range.

Step 2: Strategy

Next, the attorney helps build a negotiation plan.

This may include:

  • Deciding whether to respond immediately
  • Choosing an opening offer
  • Identifying your bottom line
  • Estimating the other side’s leverage
  • Preparing counteroffers
  • Protecting sensitive information
  • Deciding when to pause or escalate

A good strategy helps you avoid emotional decisions.

Step 3: Negotiation

The attorney may communicate with the other side directly or coach you behind the scenes.

They can help negotiate:

  • Payment amount
  • Payment timing
  • Installment terms
  • Confidentiality
  • Release language
  • Dismissal of claims
  • Removal of fees or penalties
  • Future obligations
  • Enforcement terms

Step 4: Drafting the Settlement Agreement

Once terms are agreed upon, the attorney drafts or reviews the written agreement.

This is a critical step. The words in the settlement agreement determine what happens next.

The agreement should clearly explain:

  • Who is involved
  • What is being paid
  • When payment is due
  • What claims are being released
  • What happens if someone breaches the agreement
  • Whether the agreement is confidential
  • Whether either side admits liability
  • Whether any court case will be dismissed

Step 5: Closing and Enforcement

Finally, the attorney helps make sure the deal is completed properly.

This may include:

  • Confirming signatures
  • Tracking payment
  • Filing dismissal documents
  • Sending notices
  • Keeping proof of compliance
  • Addressing missed payments
  • Enforcing the agreement if needed

How to Choose the Right Settlement Attorney

Choosing the right attorney matters. You want someone who understands your type of dispute and communicates clearly.

Look for an attorney who has experience with cases like yours.

Ask questions such as:

  • Have you handled settlements like this before?
  • What outcomes have you achieved in similar cases?
  • What are the biggest risks you see?
  • What settlement range seems realistic?
  • How do you charge?
  • Are there likely extra costs?
  • How often will you update me?
  • Who will handle communication with the other side?
  • What should I do before our next call?

A good attorney should explain your options in plain language. You should leave the conversation with a clearer understanding of your risks and next steps.

How to Reduce Legal Costs

Hiring an attorney does not mean handing over a blank check. You can take steps to reduce fees and get better value.

Before your first call, prepare:

  • A one-page summary of the dispute
  • A timeline of key events
  • Copies of contracts and invoices
  • Important emails or letters
  • Prior settlement offers
  • Court papers, if any
  • A list of your questions
  • Your preferred outcome
  • Your budget concerns

The more organized you are, the less time the attorney may need to spend sorting through basic facts.

You can also ask about:

  • Flat fees for document review
  • Limited-scope representation
  • Capped hourly fees
  • Payment plans
  • Handling simple tasks yourself
  • Having the attorney review only the final agreement

This can help you control costs while still getting important legal protection.

When to Pause and Get a Second Opinion

Not every attorney is the right fit. If something feels off, it is okay to pause and get another opinion.

Consider a second opinion if:

  • The attorney guarantees a specific result
  • You feel pressured to hire immediately
  • The fee estimate seems unusually high
  • The strategy is unclear
  • The attorney does not answer your questions
  • The proposed agreement seems one-sided
  • You are uncomfortable with the advice
  • You do not understand what you are being asked to sign

A trustworthy attorney should be confident, but honest. No attorney can guarantee an outcome.

Quick Do’s and Don’ts

Do:

  • Document every exchange
  • Keep deadlines visible
  • Ask for written terms
  • Review settlement language carefully
  • Understand what claims you are releasing
  • Ask about fees upfront
  • Prepare before speaking with an attorney
  • Get help early when the stakes are high

Don’t:

  • Sign vague agreements
  • Wire money without a written contract
  • Ignore lawsuit threats
  • Assume verbal promises are enough
  • Let pressure tactics control your decision
  • Accept terms you do not understand
  • Forget to ask what happens if the other side breaches

Making the Smart Move

You should hire a settlement attorney when the dispute involves serious money, legal complexity, strict deadlines, unclear liability, aggressive tactics, or long-term risk.

If the issue is small and straightforward, you may be able to negotiate alone. But when one wrong move could cost you thousands, affect your rights, or leave you exposed to future claims, legal help can be a smart investment.

The goal is not to make the dispute more complicated. The goal is to resolve it cleanly, fairly, and with confidence.

With the right attorney, strong preparation, and a clear strategy, you can move from uncertainty to a settlement that protects your future.

Content is generated by ChatGPT.

How Do I Start Negotiating a Settlement in a Financial Dispute?

Couple Receiving Money from Advisor in Office Setting

Finding a bill that looks wrong, receiving a demand letter, or hearing someone claim you owe more than expected can feel overwhelming. Your first reaction may be stress, frustration, or even panic.

Take a breath. You can handle this.

Settlement negotiation is not about arguing louder or giving in too quickly. It is about getting organized, understanding your options, and working toward a fair result that protects your finances and your peace of mind.

If you are wondering, “How do I start negotiating a settlement in a financial dispute?” the answer begins with preparation. Once you know the facts, your numbers, and your limits, you can enter the conversation with confidence instead of fear.

Key Takeaway

To start negotiating a financial dispute settlement, gather your documents, understand your best alternative if no deal is reached, set a realistic settlement range, open the conversation with the right tone, make clear offers, and get every agreement in writing before making payment.

A strong settlement plan should include:

  • Clear records of what is owed or disputed
  • A realistic view of your financial position
  • A target number and a bottom line
  • A calm, professional opening message
  • Written proof of every offer and response
  • A signed settlement agreement before payment
  • A release confirming the matter is fully resolved

Start With Preparation, Not Pressure

Good negotiation begins with facts, not feelings.

When a financial dispute appears, it is easy to react emotionally. You may want to call immediately, defend yourself, or make a quick offer just to make the problem go away. That can be risky.

Before you negotiate, slow down and gather the full picture.

Your goal is to understand:

  • What amount is being claimed
  • Why the amount is being claimed
  • Whether the amount is accurate
  • What documents support your position
  • What documents support the other side
  • What you can realistically afford
  • What outcome would feel fair and manageable

Preparation gives you control. It also helps you avoid guessing, overpaying, or agreeing to terms that are not in your best interest.

Documents to Gather Before You Negotiate

Before your first serious conversation, collect every record related to the dispute. Organize the documents by date so you can quickly explain what happened and spot any missing information.

Helpful documents may include:

  • Contracts or written agreements
  • Invoices and billing statements
  • Payment receipts
  • Bank records
  • Account statements
  • Emails
  • Text messages
  • Letters
  • Notes from phone calls
  • Prior settlement offers
  • Demand letters
  • Collection notices
  • Proof of returned goods or canceled services
  • Screenshots of account activity
  • Any documents showing errors or inconsistencies

Once everything is gathered, highlight important details.

Look for:

  • Duplicate charges
  • Incorrect dates
  • Missing credits
  • Payments that were not applied
  • Fees that were not explained
  • Interest that seems too high
  • Charges that were never authorized
  • Promises made in writing
  • Contradictions in the other side’s records

This gives you a stronger foundation when the negotiation begins.

Understand Your BATNA

BATNA stands for “best alternative to a negotiated agreement.”

That may sound technical, but the idea is simple. Your BATNA is what you will do if settlement talks fail.

Knowing your BATNA helps you decide when to accept a deal and when to walk away.

For example, your BATNA may be:

  • Disputing the charge formally
  • Filing a complaint
  • Going to small claims court
  • Defending yourself in a lawsuit
  • Asking for mediation
  • Exploring bankruptcy options
  • Refusing payment until proof is provided
  • Continuing negotiations later

You should also think about the other side’s BATNA.

Ask yourself:

  • What happens if they do not settle?
  • Would it cost them time and money to sue?
  • Do they have strong documents?
  • Is the amount worth pursuing?
  • Would delay hurt them?
  • Are they likely to accept less for quick payment?

Here is a simple example.

If someone claims you owe $10,000, but you can pay $6,000 now, your BATNA may be refusing the demand and waiting to see if they sue. If the other side may only collect $4,000 after months of legal costs, their BATNA may be weaker than yours. That may give you room to negotiate a lower settlement.

Set a Clear Settlement Range

Before you make an offer, decide your numbers.

Do not enter a negotiation with only a vague idea of what you want. A clear range helps you stay focused and avoid making emotional decisions.

Your settlement range should include three numbers:

  • Your opening offer
  • Your target number
  • Your bottom line

Example Settlement Range

If the disputed amount is $10,000, your range may look like this:

  • Opening offer: $4,500
  • Target settlement: $6,000
  • Bottom line: $7,500

Your opening offer should be optimistic but believable. Your target number should be the result you would feel good about. Your bottom line is the highest amount you are willing or able to pay.

Once you know your range, you can negotiate with more confidence.

Choose the Right Opening Tone

The way you start the conversation matters.

A financial dispute can already feel tense, so your first message should be calm, clear, and professional. You do not need to sound weak, but you also do not need to be aggressive.

You can use a firm but cooperative tone when the facts support your position.

Example:

“I reviewed the account and believe $6,000 reflects a fair settlement. Can we discuss resolving this matter for that amount?”

You can use a softer tone when you want to reduce tension or rebuild trust.

Example:

“I would like to find a fair solution that works for both sides. Can we review the charges together and discuss possible settlement options?”

Both approaches can work. The right tone depends on the situation.

Keep Your Communication Professional

During settlement talks, emotions can rise quickly. That is normal, especially when money, reputation, credit, or business relationships are involved.

Still, your communication should stay professional.

Helpful communication tips include:

  • Pause before responding
  • Ask clarifying questions
  • Avoid blaming language
  • Keep messages short and clear
  • Repeat important terms in writing
  • Do not make promises you cannot keep
  • Do not agree to anything under pressure
  • Avoid threats unless advised by a professional
  • Stay focused on the numbers and documents

A calm tone can help keep the conversation moving. It also creates a better written record if the dispute continues.

Structure Your Offer Carefully

A settlement offer should be clear, specific, and easy to understand.

Instead of saying, “I can pay something,” be specific about the amount, timing, and conditions.

A strong offer may include:

  • The exact amount you are offering
  • Whether it is a lump sum or installment plan
  • When payment will be made
  • What you expect in return
  • Whether the amount settles the dispute in full
  • Whether late fees or interest will be removed
  • Whether collection activity will stop
  • Whether the other side will provide a signed release

Example:

“If you accept $6,000 as full and final settlement of this account, I can pay that amount within 10 business days after receiving a signed settlement agreement and release.”

This kind of offer is clear and organized. It also protects you by making payment conditional on written confirmation.

Use Concessions Wisely

Negotiation usually involves movement. You may offer more money, faster payment, or easier terms. The key is to make every concession count.

Do not give something away without asking for something in return.

For example:

  • If you increase the payment amount, ask for removal of late fees
  • If you agree to pay faster, ask for a discount
  • If you agree to installments, ask for no added interest
  • If you agree to settle, ask for a written release
  • If you agree to pay by a certain date, ask for collection activity to stop

A helpful phrase is:

“If I do this, then I need that.”

Example:

“If I agree to pay $6,000 in one lump sum, then I need written confirmation that the account will be settled in full and all late fees will be removed.”

This keeps the negotiation balanced.

Consider Payment Options

A settlement does not always have to be one lump-sum payment. Depending on the dispute, you may have several options.

Possible payment structures include:

  • Lump-sum payment
  • Installment plan
  • Reduced payoff
  • Deferred payment date
  • Waiver of late fees
  • Interest reduction
  • Partial payment with release
  • Payment in exchange for corrected records
  • Non-monetary terms

If cash flow is tight, installments may be more realistic. If the other side wants fast resolution, a lump-sum payment may help you negotiate a lower amount.

The best structure is one you can actually follow.

Know When to Pause

Sometimes the smartest move is to pause the negotiation.

You may need to slow things down if the other side is pressuring you, changing terms, refusing to provide paperwork, or demanding immediate payment without a written agreement.

Red flags include:

  • Refusal to put terms in writing
  • Sudden changes to agreed terms
  • Pressure to wire money immediately
  • Threats without documentation
  • Unclear payment instructions
  • Requests to pay a different party
  • Refusal to provide proof of the debt
  • Refusal to confirm settlement in full
  • Vague promises about what will happen after payment

If something feels off, stop and verify.

A simple response may be:

“I am willing to continue discussing settlement, but I need the proposed terms in writing before making any payment.”

That is reasonable, professional, and protective.

Know When to Involve a Professional

Some financial disputes are simple enough to handle directly. Others require professional support.

You may want to involve an attorney, mediator, accountant, or financial advisor if:

  • The amount is large
  • A lawsuit has been threatened
  • You received legal papers
  • Contract terms are unclear
  • Business assets are involved
  • Your credit or license may be affected
  • The other side has an attorney
  • You feel pressured or confused
  • There may be tax consequences
  • You are considering bankruptcy

Getting help does not mean you are escalating the conflict. It means you are protecting yourself before making a major decision.

Get the Agreement in Writing

This step is critical.

Never rely only on a phone conversation or verbal promise. Before you pay, get the settlement terms in writing.

The written agreement should clearly state:

  • The names of the parties
  • The amount to be paid
  • The payment deadline
  • The payment method
  • Whether the settlement is full and final
  • Whether fees, interest, or penalties are waived
  • Whether collection activity will stop
  • Whether a release will be provided
  • What happens if a payment is missed
  • Who must sign the agreement

A written agreement helps prevent future confusion. It also gives both sides a clear record of what was promised.

Finalizing the Settlement

Once terms are agreed, move carefully through the final steps.

Use this checklist:

  • Send or request a written settlement memo
  • Review every term before signing
  • Confirm the payment method
  • Confirm the payment deadline
  • Ask for a signed agreement or release
  • Make payment only as agreed
  • Save proof of payment
  • Request confirmation that the matter is resolved
  • Keep all records in a safe place

Do not delete emails, receipts, or signed documents. You may need them later if someone claims the dispute was not resolved.

Quick Do’s and Don’ts

Do:

  • Stay calm
  • Gather documents first
  • Know your numbers
  • Set a settlement range
  • Ask questions
  • Use written communication
  • Make conditional offers
  • Request a signed agreement
  • Keep payment receipts
  • Get professional help when needed

Don’t:

  • Pay before getting terms in writing
  • Agree under pressure
  • Ignore suspicious changes
  • Make emotional offers
  • Guess at facts
  • Overpromise
  • Accept vague verbal assurances
  • Forget to ask for a release
  • Send money to an unverified account
  • Assume the dispute is closed without written confirmation

Take Control of the Negotiation

Starting a settlement negotiation in a financial dispute may feel intimidating, but it becomes much easier when you follow a clear process.

Begin by gathering your records. Understand your BATNA. Set a realistic range. Open the conversation calmly. Make structured offers. Trade concessions wisely. Pause when something feels wrong. Most importantly, document the agreement before making payment.

With the right preparation, you can move from stress to strategy and give yourself a much better chance of reaching a fair, workable settlement.

Content is generated by ChatGPT.

What Happens During Business Mediation?

A business dispute can feel like a hidden leak behind the walls. You know something is wrong, you know it needs attention, but you may not know how expensive, stressful, or time-consuming the fix will be.

That is where business mediation can help.

Mediation gives business owners, partners, vendors, clients, and other parties a calmer way to work through disagreements without immediately jumping into a courtroom battle. It is private, structured, and focused on finding practical solutions that both sides can live with.

If you have never been through mediation before, you may be wondering what actually happens in the room, what you should bring, and what kind of outcome you can expect. This guide walks you through the process step by step so you can feel prepared, confident, and ready to participate.

Key Takeaway

Business mediation is a guided negotiation led by a neutral mediator. The mediator does not choose a winner or force a decision. Instead, they help both sides communicate, identify issues, explore options, and work toward a possible agreement.

In most business mediation sessions, you can expect:

  • Preparation before the session
  • An opening meeting with ground rules
  • Joint discussions between both sides
  • Private meetings with the mediator
  • Negotiation and creative problem-solving
  • A possible written settlement agreement
  • Next steps if no agreement is reached

What Is Business Mediation?

Business mediation is a structured negotiation guided by a neutral third party called a mediator.

The mediator’s job is not to decide who is right or wrong. The mediator does not act like a judge, jury, or arbitrator. Instead, the mediator helps both sides talk through the conflict, understand each other’s concerns, and search for a workable solution.

This can be helpful in many business disputes, including:

  • Partnership disagreements
  • Contract disputes
  • Vendor or supplier conflicts
  • Customer payment disputes
  • Employment-related business issues
  • Commercial lease disagreements
  • Franchise disputes
  • Ownership or shareholder conflicts
  • Service agreement problems
  • Business breakup negotiations

Mediation is often attractive because it is usually more flexible, private, and practical than litigation.

How Is Mediation Different From Negotiation or Litigation?

Mediation sits somewhere between informal negotiation and formal litigation.

Negotiation can be casual. Two parties may talk directly, exchange emails, or have attorneys discuss possible terms. It can work well, but it may become frustrating if emotions rise or communication breaks down.

Litigation is the court process. It is public, formal, and usually controlled by strict rules and deadlines. A judge or jury may ultimately decide the outcome.

Mediation offers a different path. It is structured, but still flexible. It allows both sides to speak openly, review options, and explore solutions without handing full control to the court.

Some of the biggest benefits of mediation include:

  • More privacy than court
  • More control over the outcome
  • Faster progress in many cases
  • Lower cost compared to extended litigation
  • Flexible solutions beyond money
  • Better opportunity to preserve business relationships

Before Mediation: Preparation Makes a Big Difference

A successful mediation often starts before anyone enters the meeting room or logs into the video call.

Preparation helps you stay focused, understand your goals, and avoid being caught off guard. Most parties, often with help from their attorneys, prepare by organizing facts, reviewing documents, and deciding what a good outcome might look like.

Before mediation, you should usually gather:

  • Contracts
  • Invoices
  • Emails
  • Text messages
  • Payment records
  • Delivery records
  • Timelines of key events
  • Meeting notes
  • Financial records
  • Photos or other supporting evidence
  • Prior settlement offers
  • Relevant policies or agreements

You should also think carefully about your goals.

Ask yourself:

  • What outcome do I truly need?
  • What would be nice to have?
  • What am I willing to compromise on?
  • What result would protect my business?
  • What result would save time or money?
  • What result would help preserve a relationship?
  • What result would allow everyone to move forward?

This is also the time to confirm logistics.

Important logistics may include:

  • Who will attend the mediation
  • Whether decision-makers will be present
  • Whether attorneys will participate
  • Whether the session will be in person or online
  • What confidentiality terms apply
  • Whether documents should be exchanged in advance
  • How long the session is expected to last

A simple preparation checklist can help keep everything organized.

Business Mediation Preparation Checklist

Before the session, prepare:

  • A short timeline of events
  • Key contracts or written agreements
  • Important emails or messages
  • A list of disputed issues
  • Your preferred outcome
  • Your settlement range
  • Your backup plan if no deal is reached
  • Names of attendees and decision-makers
  • Questions you want answered
  • Documents that support your position

The more prepared you are, the more productive the session can be.

The Opening Session: Setting the Tone

Most mediations begin with everyone together in the same room or virtual meeting.

The mediator usually starts by explaining the process. This opening helps everyone understand the rules and expectations before the discussion begins.

The mediator may explain:

  • The mediator’s neutral role
  • Confidentiality rules
  • The importance of respectful communication
  • How joint discussions will work
  • How private meetings will work
  • When breaks may happen
  • How settlement offers may be exchanged
  • The goal of creating options

Each side may then give a brief opening statement. This is not the same as giving testimony in court. It is not about proving every detail. It is a chance to explain the dispute, describe the impact, and identify what matters most.

A strong opening statement is usually:

  • Clear
  • Brief
  • Professional
  • Focused on facts
  • Focused on goals
  • Respectful in tone

The mediator may help reframe the conversation so it does not become a fight about every past frustration. The goal is to move toward problem-solving.

Joint Sessions: Sharing Views and Identifying Issues

Joint sessions allow both sides to discuss the dispute in a controlled setting.

This can be one of the most valuable parts of mediation because each party gets a chance to explain their perspective while the mediator manages the conversation.

During joint sessions, the mediator may ask questions like:

  • What are the main issues preventing agreement?
  • What does each side need in order to move forward?
  • What facts are agreed upon?
  • What facts are still disputed?
  • What business concerns are driving the conflict?
  • What options have already been discussed?
  • What solution would reduce risk for both sides?

The mediator may also help identify the difference between positions and interests.

A position might be: “We want full payment immediately.”

An interest might be: “We need predictable cash flow and assurance that future obligations will be met.”

That distinction matters because interests often open the door to creative solutions.

Private Caucuses: What Happens Behind Closed Doors?

At some point, the mediator may separate the parties into private meetings. These are often called caucuses.

A private caucus allows one side to speak with the mediator confidentially. This can be helpful when sensitive information, business concerns, or settlement limits need to be discussed.

In a private caucus, you may talk about:

  • Your real priorities
  • Your concerns about the other side’s offer
  • Your settlement range
  • Business risks
  • Financial limitations
  • Possible creative terms
  • What you are willing to say to the other side
  • What you want to keep confidential

The mediator will usually not share private information unless you give permission.

Private caucuses can be powerful because they allow honest conversations without making either side feel exposed. However, they should be used carefully. If one side feels left out or suspicious, trust can weaken. That is why it is helpful to discuss caucus strategy with your attorney before the session.

Negotiation: Where Creative Solutions Begin

One of the most exciting parts of mediation is that the solution does not have to be limited to a simple payment.

Yes, money is often part of a business settlement. But mediation can also create business-focused solutions that a court may not be able to provide.

Creative mediation solutions may include:

  • Structured payments over time
  • Revised contract terms
  • Future service credits
  • Territory adjustments
  • New delivery schedules and garage door repair arrangements for commercial properties
  • Updated reporting requirements
  • Vendor approval changes
  • Confidentiality agreements
  • Non-disparagement terms
  • Joint customer communications
  • Return of inventory or equipment
  • Buyout terms
  • Revenue sharing
  • New operating procedures
  • Modified noncompete or nonsolicitation terms

For example, two partners in a distribution business may be fighting over territory rights. Instead of forcing one partner to buy out the other immediately, they might agree to a phased territory split, temporary revenue sharing, and joint customer messaging for a set period.

That kind of solution can protect customers, preserve revenue, and reduce the damage caused by the dispute.

Reaching an Agreement

If both sides reach terms, the next step is usually putting the agreement in writing.

This may begin as a memorandum of understanding, term sheet, or settlement agreement. Attorneys often help draft or review the final document so the obligations are clear.

A strong settlement agreement may include:

  • Names of the parties
  • Payment terms
  • Deadlines
  • Confidentiality provisions
  • Release language
  • Non-disparagement terms
  • Future obligations
  • Consequences for nonpayment
  • Enforcement terms
  • Signatures from authorized parties

A signed settlement agreement is usually enforceable if it meets legal requirements. However, it is different from a court judgment. In some situations, the agreement may be filed with the court or converted into a court order. Your attorney can explain which option makes sense for your situation.

Before signing, make sure you understand every term. Do not rush through the document just because everyone is tired at the end of a long mediation day.

What If Mediation Does Not Lead to a Deal?

Mediation does not always end with a signed agreement, and that does not mean it failed.

Even when the parties do not settle, mediation can still help by:

  • Narrowing the issues
  • Clarifying each side’s position
  • Revealing missing information
  • Identifying possible settlement ranges
  • Reducing emotional tension
  • Creating a foundation for future talks

Sometimes parties need more time. A business owner may need board approval. A financial expert may need to review numbers. An attorney may need to revise proposed terms. In other cases, the parties may pause, regroup, and return for another session later.

If mediation does not resolve the dispute, possible next steps may include:

  • Continued negotiation
  • A second mediation session
  • Arbitration, if required by contract
  • Litigation
  • Additional document exchange
  • Expert review
  • Direct business discussions

The key is to treat mediation as progress, even if it does not solve everything in one day.

How Long Does Business Mediation Take?

The length of mediation depends on the complexity of the dispute, the number of parties, and how prepared everyone is.

A straightforward dispute may settle in one full-day session. More complex matters may require multiple sessions over several weeks or months.

Typical timelines include:

  • Single-session mediation: often one full day
  • Multi-session mediation: several days or weeks
  • Complex business disputes: several months, especially if experts, approvals, or financial reviews are needed

Delays can happen when:

  • Decision-makers are not present
  • Financial information is incomplete
  • Documents are missing
  • Emotions are running high
  • There are multiple parties
  • Insurance coverage is involved
  • Expert reports are needed
  • External deadlines affect settlement options

To keep things moving, confirm early that the right people will attend and that they have authority to make decisions.

Practical Tips for a Better Mediation Experience

Mediation is part strategy, part communication, and part patience. A few simple habits can make the experience much smoother.

Before and during mediation:

  • Prepare short notes so you stay focused
  • Bring the right documents
  • Make sure decision-makers are available
  • Listen before responding
  • Ask clarifying questions
  • Avoid personal attacks
  • Stay open to creative options
  • Think about long-term business impact
  • Take breaks when needed
  • Review all written terms carefully

It also helps to frame offers in a way that shows mutual benefit. Instead of only saying what you want, explain how the proposal helps both sides reduce risk, save time, protect customers, or move forward.

Helpful Questions to Ask During Mediation

Good questions can move the conversation forward and help uncover better solutions.

Consider asking:

  • What are the biggest obstacles to settlement?
  • What information does the other side still need?
  • What options would reduce risk for both parties?
  • Are there non-monetary terms that could help?
  • Would structured payments solve part of the problem?
  • Can future business terms be adjusted?
  • What deadlines matter most?
  • What happens if we do not resolve this today?
  • What terms need to be written clearly?
  • Who must approve the final agreement?

These questions help keep the discussion productive and solution-focused.

A Smarter Way to Handle Business Conflict

Business mediation gives parties a private, practical, and flexible way to address disputes. The process usually moves through preparation, opening discussions, joint sessions, private caucuses, negotiation, and possible settlement.

It is not about avoiding tough conversations. It is about having those conversations in a better setting, with a neutral mediator guiding the process and helping both sides look for solutions.

If your business is facing a dispute, speak with your counsel about whether mediation makes sense. Ask for mediator profiles, review the mediation agreement carefully, gather your documents, and prepare a clear timeline before the session begins.

The better prepared you are, the better your chances of using mediation to protect your time, your money, your reputation, and your business relationships.

Content is generated by ChatGPT.